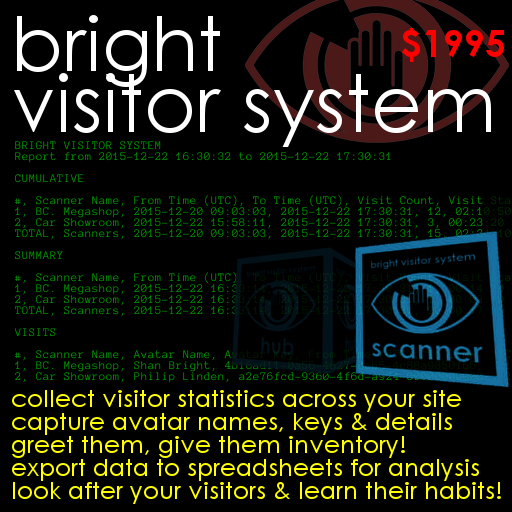
Record visitor statistics, name & UUID lists, greet arrivals & give inventory!
The Bright Visitors System allows you to greet people as they arrive at your Second Life venue, and send them a goodbye message when they leave.
It can give them anything you'd like them to have: landmarks, information notecards, and even free gifts.
You can have the system send you a brief notification whenever a visitor arrives or departs.
If your venue is divided into different areas, you can have the system monitor them separately, customising any greetings, goodbyes, or gifts to each.
And you will receive regular emailed reports detailing the number of visits to your venue, and their length: broken down by area if you have defined different areas.
If you wish, emails can also include a complete list of the visits on which the reports are based, giving each individual visitor's avatar name, key, arrival and departure time.
You can even choose to have your reports sent in CSV (or "Comma Separated Value") format. Cut the report lines from your email, and they can be pasted into (or at least saved in a separate file and imported by) almost any spreadsheet program, allowing you to analyse the data as you wish.
So make your visitors welcome. Greet them when they arrive. Offer them landmarks, information and gifts. Say goodbye when they leave. And discover how many people visit your site, when they come, how long they stay, where they go, and who they are.
The system is sold boxed in an object called "Bright Visitor System boxed". Just drag this from your inventory onto the ground to rez it.
Right-click the box, and select "Open" from the pop-up menu. This will display a contents window, showing you what is inside. Click the "Copy To Inventory" button at the bottom, and a new folder called "Bright Visitor System boxed" will be created in your inventory.
The folder will contain a copy of this manual, and two objects: a "hub" and a "scanner".
The "hub" is the core of the system. You will rez one in each region where you plan to use the system: so unless you run venues in different regions, you will only need one.
You will rez a "scanner" in each part of your venue you wish to monitor. You may only need one, monitoring the whole site, or you may rez many, each monitoring different areas.
Below, you will learn how to set up your hub and your scanners.
You need to rez a single hub in each region where you plan to use the system.
That is, *one* hub, *anywhere* in the region: regardless of any parcels into which the land may have been divided, and regardless of how many scanners you plan to rez in the region.
You don't need to own the region, or even the land parcel: as long as you can rez, and run scripts, the system will work.
Rez the "Bright Visitor System Hub" from your system's folder in your inventory, and open its contents window as you did above.
You will see the notecard "SETTINGS" listed: double click to open it.
The settings listed in this notecard are explained below. You may change them as you wish. When you have finished, click the "Save" button.
The hub and the scanners change colour according to their status: a list of the colours is given later. When you rezzed the hub, it was red, indicating that it was switched off.
It will now turn yellow, to indicate it is restarting, and reading the new settings. If it discovers any problems, it will turn purple, and give you an error message to explain why. If this happens, just re-open the "SETTINGS" notecard, correct any mistakes, and click "Save" again.
When all is well, the box will go back to red, meaning it is ready to use, but off. To switch it on, click it to display a menu with a single button: [ON]. Click [ON], then [ON!] to confirm, and your hub will turn white, flashing green, to indicate it is running.
(Note that changing settings resets the hub. This will not clear the cumulative visit statistics stored for each scanner, but it will clear recent visits stored for inclusion in the next report: if you need to change the settings in the future, you may wish to produce a report first. See "THE HUB MENU" below.)
email-address, change-me@thisisnotmyrealemail.com - The address to which the report emails should be sent. If you don't want these emails to clog up your personal mailbox, just Google "free email address", and you'll find dozens of sites which can offer you a separate email address for them.
capture-visits, yes - Leave this as "yes" if you'd like to capture not only the total number of visits and length of stay for each scanner, but you'd also like to know individual visitors' names, their keys, and their arrival and departure times. If you'd prefer just the summary statistics, change this to "no".
status-text, no - Set this to "yes" if you'd like to see status information in floating text over the hub: "no" otherwise.
csv-format, no - Set this to "yes" if you'd prefer your reports to show information in CSV or "Comma Separated Value" format: if not, "no". CSV is a little more compact, so it can make the reports shorter, though a little harder to read at a glance. Its real advantage is that it can be cut from a report in your chat log or email, and pasted or imported into almost any spreadsheet program.
report-hours, 12: The maximum number of hours between reports. Leaving this at 12 will mean you receive reports at least twice a day. You can change it to any value between 1 (for hourly reports) to 168 (weekly reports).
Note this is a maximum. Like all Second Life scripts, those driving the hub have a finite amount of memory, so can only store so much data ready for a report. If you have one scanner, and "capture-visits, yes", memory runs low after around 200 to 250 visitor names, keys, arrival and departure times. The hub then triggers a report of the stored visits.
To ensure precisely regular reports, you need to choose a report-hours value safely shorter than the time it generally takes you to receive 200 or so visits - or if you are only interested in summary statistics, set "capture-visits, no".
However, if you simply wish the visits to be condensed into as few reports as possible, set report-hours to 168, and allow the system to send reports every time it reaches capacity. No data will be lost: the reports will simply cover slightly different lengths of time.
You will need to rez one scanner in each part of your venue in which you wish to collect visitor information.
A scanner can monitor visitors up to 96m away, meaning that it can monitor a huge ball of space, 192m in diameter. At ground level, this would cover most of a region. For many users, this will mean that a single scanner can monitor their entire venue.
However, scanners can be limited to monitor smaller ranges, or even only within specified coordinates. Even if you were (say) running a shop which could be completely covered by a single scanner, you might still choose to use more than one: setting up one to monitor visitors to women's clothing on the first floor, another for men's on the second, and a third for your roof cafe. They can be configured very precisely.
Setting up a scanner is very similar to setting up the hub as described above. Begin by rezzing the "Bright Visitor System Scanner".
Right-click the scanner, click "Edit" to open its edit window, and give it a short, meaningful, unique name: this is the name which will appear on reports.
Then, as you did with the hub, open its contents window.
If you wish to give visitors anything - landmarks, notecards with information or rules, free gifts and so forth - simply drag these items from your inventory into the contents window.
(Remember that to give items away, you need to have copy and transfer permissions to those items. If you drop anything into the scanner without those perms, the scanner will turn purple to indicate that it is out of service, and you'll see an error message. Just remove the offending items from the contents window to correct this.)
Then, again as you did with the hub, double click the "SETTINGS" notecard to open it. The meaning of each setting is explained below. Edit them as you wish, and when done, click "Save".
If the scanner discovers any problems with the settings it will turn purple, and produce an error message. Re-edit the notecard as needed and save it again. When all is well, the scanner will turn red to indicate that it is ready, but switched off.
Click the scanner to display its menu, click the [ON] button, and click [ON!] to confirm. The scanner will turn white, and periodically flash green to show it is running.
scan-cycle, 10 - The number of seconds between "scans" for new arrivals. Scanning every 10 seconds ensures that only the most fleeting of visitors will be missed, but the scanning process will create no appreciable "lag". The scan-cycle can be set as low as 5, or much higher, but unless you have a good reason to change it, 10 is a good setting.
range, 96 - In metres, how close avatars must be to the scanner to be detected. The minimum is 1, the maximum (imposed by Second Life itself) 96.
min-x, 0 ... max-z, 4096 - The coordinates within which avatars will be detected (providing they are also within the range above).
Remember - these are *region coordinates*. X=0, Y=0, Z=0 refers to a point below ground in the south east corner of the region. The X coordinate measures how far west you are of that point, the Y coordinate how far north, and the Z coordinate how far above. Because regions are 256m square, X and Y can never be bigger than 256. Z goes up to a "build ceiling" of 4096m, above which you cannot rez prims.
So for instance, if you only wished to scan avatars on the second floor of a building, you need to find out how high the floor is, and how high the ceiling - in other words, the Z coordinates of the floor and ceiling prims. Say the floor was at Z=35, and the ceiling at Z=41, you could tell the scanner only to detect avatars on the second floor by setting "min-z, 35" and "max-z, 41".
status-text, no - Set to "yes" if you'd like to display running visitor totals over the scanner in floating text, or "no" to suppress this.
arrival-ims, no / departure-ims, no - "yes" if you'd like to be notified by IM as visitors arrive or depart, "no" otherwise.
welcome-message, / goodbye-message, - Messages you would like to send to visitors as they arrive or depart. Simply leave these lines blank after the comma to suppress these messages. To break a message into two or more lines, use the vertical bar character, "|". For instance, "welcome-message, Hi there!|Welcome to our place!" The message may be up to 230 bytes long.
You can now simply leave the system to run indefinitely: everything is automatic.
The scanners will greet and say goodbye to visitors, give out items, and send you notifications according to the settings you have chosen.
The hub will record details of all the visits until the next report is due, then send you an email, clear its memory, and start recording again.
And the cycle will simply repeat, looking after visitors and providing you the information you have asked for without further intervention.
You may reconfigure, add, or remove scanners at any time. Delete any scanner you no longer need. Change the settings card to reconfigure any already rezzed. And rez new scanners as you need. Even while already running, the hub will automatically include new scanners in future reports.
However, both the hub and the scanners offer menus of additional options should you need them. These are described below.
Click the hub to display the hub menu. It will look something like this:
[OFF] - Stops the hub & clears visits
[INTERIM] report - Doesn't clear data
[STANDARD] report - Clears visits
[CLOSING] report - Clears everything
Next report due 2015-12-22 13:00:20 (UTC)
[OFF]
[INTERIM] [STANDARD] [CLOSING]
Click [OFF] to turn the hub off. While the hub is off, you will receive no reports, and new visits will not be recorded for future reports: even if the scanners are still on. (But if they are on, they will continue to send greetings and items to visitors, send notifications to you, and update their cumulative visit totals, even if the hub is off).
Note that turning off the hub clears any visits it was storing for inclusion in its next report, so if that data is important, you may wish to run a report before switching it off.
The next three buttons all trigger an immediate report, rather than waiting for the next report to fall due. The reports they produce are all the same: the only difference lies in what (if any) data they clear after the report has been produced.
No data is cleared after an [INTERIM] report. This means that all the visits reported will appear again on the next report. This is useful if you are already receiving (say) a regular, daily report, and don't want any of the visits due to be reported later to be removed from the regular report, but just want to get a sneak "how are things going" preview of the day so far.
After a [STANDARD] report, all the visits stored in the hub will be cleared. The next report will only show visits which happen *after* the standard report has been produced.
A [CLOSING] report clears not only the new visits reported, but the *cumulative* visit totals automatically kept for each scanner. The effectively clears down the entire system, which will then start recording visits again as if it had just been installed.
**NOTE**: It is an excellent idea to run a CLOSING report immediately after you have installed all your scanners for the first time. Though it will have very little data on it, it will have the effect of setting all the scanners "cumulative since" dates and times to the same value, as if they had all been switched on at exactly the same moment.
Click the scanner to display the scanner menu. It looks like this:
Scanner ON, 3 avatars present
Since 2015-11-01 09:04:22 (UTC)...
...131 visits lasting 14:21:58
[OFF] - Stops the scanner
[RESET] - Resets cumulatives
[RESET+OFF] - Resets & stops scanner
[OFF] [RESET] [RESET+OFF]
Click [OFF] to switch the scanner off.
While the scanner is off, it will not greet visitors, give out items, or send you notifications. Nor will it report any new visits to the hub, to appear on a report later.
Click [RESET] to set the *cumulative* visit statistics for the scanner back to zero, but leave it running.
Click [RESET+OFF] to clear the cumulatives and switch the scanner off.
(Note: None of these buttons - not even deleting the scanner - will prevent visits already reported to the hub and waiting to appear on the next report being reported.)
Reports are split into three parts.
The CUMULATIVE section shows the total number of visits, and time stayed, since each scanner was installed (or since the cumulatives were last cleared.)
The SUMMARY section shows the number of visits to each scanner, and the time stayed, since the last (non-interim) report.
The VISITS section shows the avatar name, key, arrival time, and departure time, for each individual visit since the last (non-interim) report. This section will be omitted if you have chosen the setting "capture-visits, no".
BRIGHT VISITOR SYSTEM
Report from 2015-12-22 16:30:32 to 2015-12-22 17:30:31
(*Closing* report: visits and cumulatives cleared)
CUMULATIVE
[1] Demo Scanner 1
From 2015-12-20 09:03:03 to 2015-12-22 17:30:31
12 visits lasting 02:10:50
[2] Demo Scanner 2
From 2015-12-22 15:58:11 to 2015-12-22 17:30:31
3 visits lasting 00:23:20
[TOTAL] All Scanners
From 2015-12-20 09:03:03 to 2015-12-22 17:30:31
15 visits lasting 02:34:10
SUMMARY
[1] Demo Scanner 1
From 2015-12-22 16:30:32 to 2015-12-22 17:30:31
1 visits lasting 00:14:20
[2] Demo Scanner 2
From 2015-12-22 16:30:32 to 2015-12-22 17:30:31
1 visits lasting 00:03:10
[TOTAL] All Scanners
From 2015-12-22 16:30:32 to 2015-12-22 17:30:31
2 visits lasting 00:17:30
VISITS
[1] Shan Bright - 4b16ad11-0a56-4627-8eb6-4c88a9850fb5
00:14:20 from 2015-12-22 16:34:05 to 2015-12-22 16:48:25
Scanner: Demo Scanner 1
[2] Philip Linden - a2e76fcd-9360-4f6d-a924-000000000003
00:03:10 from 2015-12-22 17:01:15 to 2015-12-22 17:04:25
Scanner: Demo Scanner 2
END OF REPORT
Note that Second Life sets a limit on the size of emails, so if you are capturing individual visits, and there are many of them, the report may be broken across a series of emails. However, both the emails, and the individual visits, are numbered to avoid confusion.
BRIGHT VISITOR SYSTEM
Report from 2015-12-22 16:30:32 to 2015-12-22 17:30:31
(*Closing* report: visits and cumulatives cleared)
CUMULATIVE
#, Scanner Name, From Time (UTC), To Time (UTC), Visit Count, Visit Stay
1, Demo Scanner 1, 2015-12-20 09:03:03, 2015-12-22 17:30:31, 12, 02:10:50
2, Demo Scanner 2, 2015-12-22 15:58:11, 2015-12-22 17:30:31, 3, 00:23:20
TOTAL, All Scanners, 2015-12-20 09:03:03, 2015-12-22 17:30:31, 15, 02:34:10
SUMMARY
#, Scanner Name, From Time (UTC), To Time (UTC), Visit Count, Visit Stay
1, Demo Scanner 1, 2015-12-22 16:33:14, 2015-12-22 17:30:31, 1, 00:14:20
2, Demo Scanner 2, 2015-12-22 16:33:14, 2015-12-22 17:30:31, 1, 00:03:10
TOTAL, All Scanners, 2015-12-22 16:33:14, 2015-12-22 17:30:31, 2, 00:17:30
VISITS
#, Scanner Name, Avatar Name, Avatar Key, From Time (UTC), To Time (UTC), Visit Stay
[08:34] Bright Visitor System Hub #010 (Home):
1, Demo Scanner 1, Shan Bright, 4b16ad11-0a56-4627-8eb6-4c88a9850fb5, 2015-12-22 16:34:05, 2015-12-22 16:48:25, 00:14:20
2, Demo Scanner 2, Philip Linden, a2e76fcd-9360-4f6d-a924-000000000003, 2015-12-22 17:01:15, 2015-12-22 17:04:25, 00:03:10
END OF REPORT
Colour Changes
As has been mentioned a number of times above, both the hub and the scanners use a colour code to indicate their state. These colours run:
Yellow: Starting up
Purple: Problem: Out of service
Red: Switched off
White flashing green: Working
Blue: Producing report (hub only)
Editing Hubs and Scanners
You are welcome to edit any hub or scanner: and most simply, you may wish to make scanners smaller to make them less conspicuous. However, please don't change their colour: both boxes change their colour to indicate their state.
You are welcome to retexture them, though you should remember that their colour changes will affect the appearance of new textures. The textures supplied are black and white: you may find also using black and white textures works best. Try at least to have enough white in the texture to clearly show the underlying colour of the prim, which provides useful information.
Number of Scanners
In principle, the system can handle up to 99 scanners, though depending on a number of factors, you may experience memory or performance problems before reaching this number: and we could not guarantee the function of more than 40.
Visits Across Report Boundaries
If an avatar is within a scanner's area *while a report is being produced*, their visit will effectively be broken into two: one at the end of the current report (from their arrival to the report end time), and another at the beginning of the next report (from the report start time to their departure).
However, they will only be added to the cumulative visit count *once*, only greeted, given items, or sent a goodbye message on their actual arrival or departure, and you will only receive notifications - if you have chosen to receive them at all - on their actual arrival or departure.
Time
All times are shown in UTC ("Universal Time Coordinated"/"Universel Temps Coordonné"), the time from which world time zones are calculated.
SLT ("Second Life Time") is always the local time in San Francisco, where Linden Lab are based, so roughly November to March this is PST ("Pacific Standard Time") or UTC-8h, and the rest of the year PDT ("Pacific Daylight Time") or UTC-7h. It was to avoid the complications of daylight saving time, and make calculations as easy as possible for the international Second Life userbase, we chose UTC :)
* In your Second Life viewer, make sure you have enabled the routing of IMs to email while you are offline, or you will lose reports if you don't happen to be in-world.
* Similary, enable your chat log, so that if you receive a report while in-world, it will automatically be stored in your chat log file on your computer, where you can read it later, or copy it to paste it elsewhere.
* Use the scanner's ability to give items to visitors imaginatively. At the very least, give your visitors a landmark. But you may include the rules of your sandbox, or a freebie T-shirt with your logo, or a costumes or attachments for your role-playing area. And explain what they are being given in a welcome message.
* Consider using CSV format reports and transferring the output to a spreadsheet. Though the cutting and pasting can seem fiddly the first time you do it, once you are used it it can be done very quickly. Once in a spreadsheet, you can accumulate long histories of data, and even produce charts and graphs, exactly as RL businesses do about the own operations. You will discover things about your venue and its visitors you never knew.
Shan Bright
Chief Executive Officer