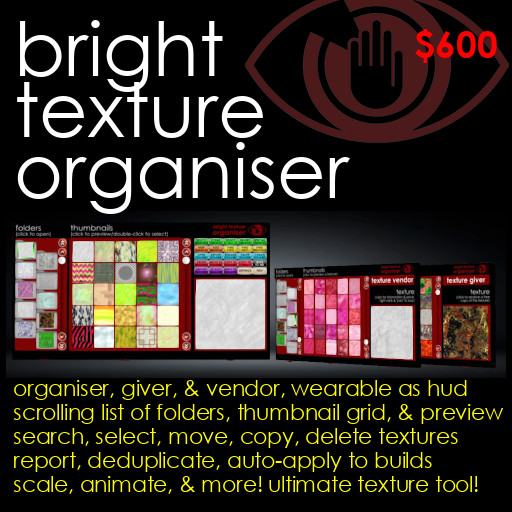
In-world/HUD texture organiser, giver & vendor: folders, thumbnails, & more!
The Bright Texture Organiser is the perfect way not just to store your textures, but to display them, build with them, give them out, or even sell them. Wear it as a HUD, or rez it in-world.
It makes managing textures as easy as using your computer's file manager. On the left is a scrolling, alphabetically sorted list of folders, which you can rename, add, or delete at will. Click any folder to "open" it, and the centre of the organiser will show a scrollable grid of thumbnails of all the textures it contains. Click one of these, and the corresponding texture will be shown in the large preview window on the right.
To add textures, just drag them from your inventory, hold down your Control key, and drop them on the organiser. You can drop them on a particular folder, or just drop them anywhere else to add them to whichever folder is currently open.
Double-click a thumbnail to mark it as "selected". Each selected thumbnail will be highlighted: and you can move or copy your selected textures to another folder, or delete them, or copy them to another organiser, or back to your own inventory!
You can also search for textures - for instance, selecting all textures with "flower" in their name - or automatically select textures you have created yourself, or you added today, or which are duplicates. Then move your duplicates to another folder, or delete them!
All textures must have copy and transfer permissions (and full perms for dedupication), but no modify textures can also be stored, used, or distributed.
Experiment to see what a previewed texture looks like when differently scaled, or even animated. Click-button menus let you change its mapping (default/planar), repeats, offsets, and rotation: all the parameters you can set through the Second Life edit tool. They also let you apply smooth, rotational, scaling (zooming), or frame by frame animation, and then adjust the animation parameters and rates.
And you can apply any texture in the organiser to your builds without ever returning it to your inventory. The organiser will give you a script which you can drop into any object you are creating, and then apply the previewed texture - complete with the scaling and animation you have chosen - to any face on any prim you click. Click different thumbnails to change the previewed texture, and click your object again: it's the quickest way to experiment to see how different textures look.
The organiser is copyable: so while each one can have up to 100 folders, you can keep as many organisers as you need! And copying textures between organisers is as easy as copying them between folders.
If you are a texture creator, use your organiser to distribute your work. Just rez a copy in-world, and set it into "giver" mode to let people browse and take textures for free, or "vendor" mode to sell them! The organiser's texture management options are all then hidden, and residents can scroll through the folders, click on them to open them and see and scroll through thumbnails, and then take, or buy, textures. You can set a standard price, but still individually price some textures simply by adding the price to the end of their names.
So many creators have spent years building inventories of thousands of textures, but still have to open each individually to remind themselves how each one looks. Perhaps the most important thing the Bright Texture Organiser does is simply to make it easy to see them all, so you can know and use what you have. This is how textures should always have worked in Second Life.
Store, browse, organise, apply, give out, and sell your textures - all using the Bright Texture Organiser!
While the organiser is designed to be as easy and intuitive to use as possible, it does have a lot of features, so this user guide describes them in detail.
The following topics are covered:
1. Unpacking your organiser
2. Rezzing or wearing your organiser
3. Browsing your organiser
4. Adding textures
5. Selecting textures
6. Deduplicating textures
7. Searching textures by name
8. Finding selected textures
9. Using the folders menu
10. Reporting on the textures in a folder
11. Renaming, creating, and deleting folders
12. Moving, copying, and deleting textures
13. Copying textures between organisers
14. Taking textures from your organiser
15. Reporting an individual texture's data
16. Scaling and animating a texture
17. Auto-applying textures to your builds
18. Changing your organiser's settings: mode, size, and access
19. Using your organiser as a public giver or vendor
20. Getting help
21. Using the API to interface your scripts
22. Tips
To unpack, find the object "Bright Texture Organiser boxed" in your inventory, and drag it onto the ground to rez it. Right-click, select "Open" from the pop-up menu to display the "Contents" window, and click the "Copy To Inventory" button at the bottom.
This will create a new folder in your inventory, also called "Bright Texture Organiser boxed". In this, you will find the following:
    Bright Texture Organiser
    Bright Texture Organiser note
    Torley's Textures BTO
The "Bright Texture Organiser" is an empty organiser, ready for you to copy and use.
The "Bright Texture Organiser note" is a copy of the user guide you are now reading.
The "Torley's Textures BTO" is another copy of the organiser, preloaded with the collection of 591 textures released for free use in Second Life by the great Torley Linden.
Any organiser can be rezzed in-world, or worn as a HUD.
To rez, simply drag the "Bright Texture Organiser" from your inventory onto the ground. It will automatically resize itself to its standard size of 180cm high. (You can change this height - see below under "Changing Your Organiser's Settings".)
To wear your organiser as a HUD, just double-click it in your inventory. It will automatically attach itself to your screen, and fill most of it!
You also can change the size of the HUD (see "Changing Your Organiser's Settings" below), but for now, it's worth knowing that you can "minimise" the HUD so that it takes up only a small square by clicking the Bright eye logo in the top-right corner - and then open it again by clicking the minimised square.
You can take a rezzed organiser back into your inventory and wear it, or detach an organiser you are wearing as a HUD and rez it in-world, at any time. The HUD will resize itself automatically as needed.
To experiment with the organiser, try rezzing or wearing the "Torley's Textures BTO", so you can see how one looks when it has textures in it.
On the left is an alphabetically sorted list of folders, with a scroll-bar. Each folder is represented by a small image square (showing the first texture in the folder, or a white space if the folder is empty), and a folder name in floating text, with the number of textures contained added in square brackets, eg: "#07 love [50]"
Under the list of folders you will see more floating text:
         [folders 1-10/11]
    Torley's Textures BTO [591]
This tells you which folders are currently visible in the list (1-10), the number of folders in the organiser (11), the name of the organiser (Torley's Textures BTO), and the total number of textures it contains (591).
At any time, one folder will be "open". You can tell which is open because the folder image will be animated, and have a green highlight moving around it. You can click on any folder to open it.
Ten folders can be seen in the list at any time, but you can use the scroll bar next to them to see more. Click the single arrows at the top or the bottom to scroll by 10 folders, or the double arrows to jump to the top or bottom of the list. Clicking in the middle of the bar will jump to the corresponding point in the folder list: for instance, clicking a third of the way down will scroll the folders to a point a third of the way down the folder list. (The Torley's Textures BTO only has 11 folders, so it won't scroll far.)
In the middle of the organiser is the thumbnail grid. This will show 25 "thumbnails" (or reduced images) of the textures in the open folder. This can be scrolled much like the folder list by clicking the scroll-bar next to it - each single arrow click will scroll to another 25 thumbnails.
Below the grid is more floating text:
    [#01 1-25/51]
     0 selected
This tells you the name of the open folder (#01), which texture thumbnails are currently displayed (1-25), the total number of textures (51), and the number you have marked as "selected" (0).
On the right of the organiser is the preview window. Click any thumbnail in the grid, and you will see it previewed there. The currently previewed thumbnail is animated to highlight its position in the grid.
If the open folder is not visible because the folder list has been scrolled, clicking a thumbnail will scroll the folder list back to reveal the open folder. Similarly, if the thumbnails grid has been scrolled so that the currently previewed texture does not appear in the thumbnails, clicking the preview will scroll the thumbnails to show it again.
The floating text underneath the previewed texture provides more information:
    [1/51 added 2022-09-08 16:26:23]
             Age of Sempi
This tells you the position of the previewed texture in the folder (1/51), the date and time it was added to that folder (2022-09-08 16:26:23), and its name (Age of Sempi). (Note: you may have received the texture years ago, and dropped it into your organiser months ago. The added date and time refer to the time it arrived in that particular folder.)
You can select a texture by double-clicking its thumbnail. A bar showing the flashing word "SELECTED" will appear across the thumbnail, and it will be shown in the preview window (where the word "SELECTED" will also appear). You can select as many thumbnails as you wish: to move, copy, delete, or be given to you in a folder (all of which will be explained below). Simply double-click again to deselect a thumbnail.
In the top-right of the organiser is a block of 25 control buttons: their use will also be described below.
First, find the textures you wish to add in your inventory. Select up to 50 by clicking the first, and then holding down shift and clicking the last - Second Life will highlight the ones you have selected. Then drag them over your organiser, hold down your CONTROL key, and release your mouse button to drop them.
(If you drop the textures WITHOUT holding down CONTROL, those textures will be applied to its surface - as if you were retexturing it - instead of being dropped inside. The organiser will notice this, and automatically reapply its own original textures, so it does no harm: but in general, make sure you are holding down your CONTROL key before releasing the mouse button to drop the textures.)
If you drop them directly onto one of the folders in the list on the left of the organiser, the textures will be added to that folder. If you drop them anywhere else, they will be added to whichever folder is currently open.
Please note:
1. Don't drop in more than around 50 items in one go. If you drop more, the organiser doesn't mind, but Second Life sometimes can't cope, and will send you the unfriendly message "Inventory creation on in-world object failed", meaning that some of the textures will not arrive. If you need to drop in 100 textures, drop them in smaller groups.
2. The organiser can only store textures, not items of other kinds, and the textures must have copy and transfer permissions, so:
a) If you drop in any "no copy" items (textures or otherwise), Second Life will remove them from your inventory, so the organiser will give them back to you.
b) If you drop in anything which is copyable but is either a "no transfer" texture, or not a texture at all, then the organiser will simply delete it. Because it is copyable, it will still be in your inventory, so there is no need to give it back.
3. There is no fixed limit on the number of textures you can keep into a single folder, but we'd recommend keeping each folder to less than a thousand, just because it is easier to find textures if they are divided into smaller folders.
Mark any thumbnail as selected by double-clicking. The word "selected" will appear over the thumbnail.
Click [SELECT/DESELECT] to select or deselect the currently previewed thumbnail.
Click [CLEAR SELECT] to deselect all thumbnails, or [SELECT ALL] to select them all.
Click [INVERT SELECT] to reverse all selections, selecting unselected thumbnails, and deselecting selected ones. So for instance, if you wish to select all the thumbnails except two, first select those two, then invert your selection.
Click [SPECIAL SELECT] to display this menu:
    SPECIAL SEARCH IN FOLDER "my folder"
    Which textures do you wish to select?
    [OWNER'S] created by organiser owner
    [FULL PERM] copy/trans/mod textures
    [TODAY] added on today's date
    [DUPLICATE] sharing UUIDs with textures above
        (only full perm duplicates searched)

    [OWNER'S]
    [FULL PERM] [TODAY] [DUPLICATE]
Click [OWNER'S] to select all the textures in the open folder you created yourself.
Click [FULL PERM] to select all full permission textures in the folder. (As all the textures in the organiser must have copy and transfer permissions, this effectively excludes only no modify textures.)
Click [TODAY] to select all textures which have been added to the folder on today's date.
Click [DUPLICATE] to select all duplicate textures in the folder (see "Deduplicating Textures" below).
Remember that you can use [INVERT SELECT] to reverse these criteria. For instance, to select all the no modify textures in a folder, click [SPECIAL SELECT], choose [FULL PERM], and when all the full perm textures have been selected, click [INVERT SELECT].
The number of textures you have selected at any given time is shown in the text below the thumbnail grid:
    [my folder 1-25/217]
        27 selected
Click [SPECIAL SELECT] (see "Selecting Textures" above), and then [DUPLICATE], to select all duplicate textures.
For instance, if you have three copies of the same texture in your folder, this will not select the first, but will select the second and third.
So if you click [SPECIAL SELECT], then [DUPLICATE], and then use [MOVE TO FOLDER] (see "Deleting, Moving, And Copying Textures" below) to move the selected duplicates to another folder, you will be left with one copy of each unique texture in the original folder.
Note:
1. A duplicate texture is one with the same UUID or "key". Textures are not considered duplicate just because they have similar names ("My texture" and "My texture 1"), or because they look the same.
2. Only full perm textures will be deduplicated. While it is possible to read the UUID of a no modify texture, it takes longer, and deduplication is already an intensive process. No modify textures are therefore excluded from deduplication.
3. Finding duplicates in a folder with a lot of textures can take a long time. It effectively involves comparing every possible pair of texture UUIDs. With 100 textures, this might involve around 5000 comparisons. With 1000, this is closer to about a quarter of a million comparisons. So if you are searching for duplicates in a folder of over 500 textures, you will see the following dialog box:
    ***WARNING***

    There are 515 textures in this folder. To find
    duplicates could take up to 132355 texture pair
    comparisons.

    THIS MAY TAKE SOME TIME.

    The time goes up exponentially with texture count.
    * 500 unique textures may take a few minutes
    * 1000 unique textures may take 10 or 20 minutes
    * Multiple thousands may take hours
    In a busy region, it may take much longer.

    Do you wish to continue?

    [YES!] [No]
Once you have selected duplicates, you may wish to move them to another folder, or just delete them. (See "Moving, Copying, And Deleting Textures" below.) Then you will be left with exactly one copy of each unique texture in your folder.
To search the textures in a folder by name, click [NEW SEARCH]. You will see this dialog box:
    NEW SEARCH IN "my folder"

    Please enter a search term and click [Submit].

    Current selections will be cleared.

    Matching textures will be selected instead.

    [                                        ]
    [                                        ]
    [                                        ]
    [Submit]
Enter the text you wish to search for, and click [Submit]. It is not case sensitive.
The thumbnails of all textures in the open folder with the search term in their name will be selected.
Note that clicking [NEW SEARCH] will automatically clear all current selections before it begins. If you wish to keep all your current selections, but you would like to additionally select all textures with a certain term in their name, click [ADD SEARCH] instead.
Click [FIND FIRST] to preview the first selected texture in your folder. (If the corresponding thumbnail is not visible, the thumbnails will be automatically scrolled to show it.)
Click [FIND NEXT] and [FIND PREVIOUS] to move through the selected textures.
If the last selected texture is previewed, and you click [FIND NEXT], the first will be previewed again. Similarly, clicking [FIND PREVIOUS] when you are at the first will take you back to the last.
You can open any folder by clicking it in the list of folders on the left hand side of the organiser.
Alternatively, you can click the [OPEN FOLDER] button. This will show you the folders menu:
    OPEN FOLDER

    Currently open folder: animals

    Please click a folder name, or a range:

    [12-20] mushrooms TO water

    [animals] [birds] [bushes]
    [clouds] [crops] [fish]
    [flowers] [grass] [leaves]
    [mountains] [mud] [12-20]
Some buttons will have folder names on them. For instance, clicking [fish] will open the "fish" folder.
But there are too many folders here to show one button for each, so some buttons will have number ranges, like [12-20]. Clicking this button will show you a submenu of the twelth to twentieth folders - running alphabetically from "mushrooms" to "water":
    OPEN FOLDER

    Currently open folder: animals

    Please click a folder name.

    [mushrooms]
    [paths] [people] [rock]
    [sand] [skies] [snow]
    [trees] [water] [<BACK]
You will also see this menu when you click [MOVE TO FOLDER] or [COPY TO FOLDER], to allow you to choose to which folder you will move or copy your textures. (See "Moving, Copying, And Deleting Textures" below.)
Click [REPORT FOLDER] to run a report showing information about the folder, and its selected textures. If you'd like a complete list of the textures, click [SELECT ALL] (see "Selecting Textures" above) before clicking [REPORT FOLDER]:
    [09:21] folder #07 "love": *** FOLDER REPORT ***
    TEXTURE COUNT: 50, SCRIPT MEMORY: 23428
    SELECTED TEXTURES...
    # | ACQUIRED | PERMS | UUID | CREATOR | NAME
    [09:21] folder #07 "love": 0001 | 2022-09-08
     16:31:13 | FULL PERMS |
     28006fad-9280-81df-5a33-d09b2978cce2 |
     Torley Linden | [DESAT] Greeting Card
    [09:21] folder #07 "love": 0002 | 2022-09-08
     16:31:13 | FULL PERMS |
     057532cc-dc94-0d67-8477-d8eb5fecf0ab |
     Torley Linden | [DESAT] Heart Warmer
TIP: If your spreadsheet program has a facility to import delimited text files (and most do), you can easily transfer all this information into a spreadsheet. Run the report, then open the chat log Second Life keeps on your computer (called "chat.txt"). Scroll to the bottom and you will find the report text. Cut and paste it into a new text file, and use your spreadsheet's import function to load it, specifying that the columns are separated by bar characters ("|").
Click [RENAME FOLDER] to rename a folder. The following dialog box will appear:
    RENAME FOLDER "#07 "love""

    Please enter a new name: up to 12 characters,
    not a number, and without tildes (~) or bars (|).
    It will be automatically downcased.

    [                                        ]
    [                                        ]
    [                                        ]
    [Submit]
To create or delete a folder, first make sure your organiser is rezzed: you cannot create or delete folders while wearing it as a HUD. If you don't have your own land, briefly visit a sandbox, detach your HUD, rez it, create or delete folders, then take it back and wear it again.
Click [CREATE FOLDER] to add a new folder.
    CREATE FOLDER

    Please confirm you wish to create a folder.

    [CREATE IT!] [CANCEL]
When you click [CREATE IT!], you will see another dialog box asking for permission to "link and delink". Click [Yes], and a new folder will be created and opened.
When you create a folder, it will be given a simple letter name like "~a~". The "~" character indicates that you have not yet named the folder, and forces the folder to sort below your named folders. Click [RENAME FOLDER] to give your new folder a meaningful name.
You can create up to 100 folders. Note that each one adds a prim to the organiser, raising it's land impact. With its original 20 folders, the organiser's land impact is 40: this goes up until it is 100 when you have 100 folders.
Click [DELETE FOLDER] to delete a folder, and any textures it contains. (The minimum number of folders an organiser may have is 10.)
    DELETE FOLDER "#07 "love""

    Please confirm deletion of this folder.

    WARNING: You will also delete 50 textures.

    [DELETE IT!] [CANCEL]
When you click [DELETE IT], you will see another dialog box asking for permission to "link and delink". Click [Yes], and the folder will be removed.
All of the buttons described in this section will work on whichever textures you have selected (see "Selecting Textures" above), or, if no textures are selected, on the currently previewed texture.
Click [MOVE TO FOLDER] or [COPY TO FOLDER] to move or copy the selected textures (or previewed texture) to another folder. You will then see the folders menu described above (see "Using The Folders Menu"). Choose a folder to serve as a destination.
Click [DELETE TEXTURE/S] to delete the selected textures, or the previewed texture if none are selected.
You can copy textures between organisers as easily as you can between folders.
First make sure the two organisers between which you wish to copy textures are both rezzed, or that one is rezzed and the other is worn as a HUD.
Then select the textures you wish to copy, and click the [COPY TO BTO] button.
You will see the message "Please wait, looking for BTOs...", and after a few seconds, a menu like this one:
    COPY FROM "my folder" TO ANOTHER BTO

    This will copy the 97 selected texture(s) to the
    open folder in whichever organiser you choose.

    [1] Torley's Textures @40/27/3000
    [2] Bright Texture Organiser @34/24/3000 (HUD)

    [BTO 1] [BTO 2]
Choose the [BTO] button corresponding to the organiser to which you wish to copy your textures.
Note that the textures will be copied into whichever folder the chosen organiser has open at the time, so be sure to open the right folder before copying.
To take textures from your organiser back into your inventory, first select the textures you want (or simply preview the texture if you only wish to take one), and click [GIVE TO ME]. The following menu will appear:
    PLEASE CONFIRM

    Do you wish the 277 selected textures to be given
    from folder "my folder" to you?

    (The textures will be given in folders containing
    up to 100 textures each.)

    [YES!] [No]
Note that if there are more than 100 textures, they will be given to you in a series of folders, each containing up to 100.
Click [REPORT TEXTURE] for information about the currently previewed texture.
    [10:44] folder #01: TEXTURE REPORT
    Name: Age of Sempi
    Position: 1/51
    Acquired: 2022-09-08 16:26:23
    Perms: FULL PERMS
    UUID: 33da96df-8224-d75f-45b6-c0c1c9bbf42f
    Creator: Torley Linden
You can change the scaling (or "repeats") of a previewed texture by clicking [SCALE/ANIMATE] to show the following menu:
    PREVIEW TEXTURE SCALE

    Mapping: Default (per face)
    Repeats: 1.0 horizontal, 1.0 vertical
    Offsets: 1.0 horizontal, 1.0 vertical
    Rotation: 0 degrees

    Click parameter to change, or:
    [RESET] to default 1x1
    [Presets] for preset scalings
    [Animation] to animate the texture
    [LSL] for script code to apply texture

    [RESET]
    [Mapping] [H-Repeats] [H-Offset]
    [Rotation] [V-Repeats] [V-Offset]
    [Presets] [Animation] [LSL]
Using this menu, you can change the mapping, horizontal or vertical repeats and offsets, and rotation of the texture as shown in the preview. These are all the parameters offered by the texture tab of the Second Life "edit tool", and they are explained in the Second Life documentation. See page https://wiki.secondlife.com/wiki/Building_Tools under "Texture Tab".
Click [Animation] on this menu to animate the previewed texture.
    PREVIEW TEXTURE ANIMATION

    Flags: ANIM_ON | LOOP
    Size X=1 Size Y=1 Start=1.0 Length=1.0 Rate=1.0

    (See  https://wiki.secondlife.com/wiki/LlSetLinkTextureAnim
    for help with these parameters.)

    Please click:
    [STOP] to revert to fixed scaling menu
    [Smooth]/[Rotated]/[Scaled]/[Framed]
    ...to start animation
    [LSL] for script code to apply animation
    ...or [Flags] etc. to change parameters

    [STOP] [Smooth] [Rotated]
    [Scaled] [Framed] [LSL]
    [Flags] [Size X] [Size Y]
    [Start] [Length] [Rate]
Click [Smooth], [Rotated], [Scaled], or [Framed] to start one of the four kinds of animation Second Life supports. Then click [Flags], [Size X] etc to change the parameters.
An explanation of Second Life animation is a little outside the scope of this user guide, but it is all done through a single function in the LSL scripting language: llSetTextureAnim(). For documentation on this function, including a description of how all the parameters available through this menu work, see https://wiki.secondlife.com/wiki/LlSetLinkTextureAnim
If you are a scripter, on either the scaling or the animation menu, click [LSL] to see the code you would need to insert into a script to create the scaling or animation you have selected on the preview screen.
    [10:54] Torley's Textures: To apply this animation
    in LSL, use:
    llSetLinkTextureAnim(link_number,
        ANIM_ON | LOOP | SMOOTH,
        face_number, 1, 1, 1.0, 1.0, 0.25);
You can apply textures from your organiser to your builds without having to return them to your inventory.
Begin by clicking [APPLY TO OBJECT].
You will be given a script called the "Bright Texture Applier". Accept it into your inventory, and then drag it from there, and drop it onto your build.
(Note: don't hold down your control key while dropping it, or Second Life will not run the script. Simply drag and drop.)
You will hear the message "Please wait, looking for BTOs...", and a few seconds will pass.
If you have more than one BTO rezzed in the region, a menu will pop-up and you will be asked to choose one. If there is only one, this menu will not appear.
Some floating text with instructions will appear above your object. Just click any face, on any prim, to apply whichever texture is currently previewed on the organiser. To apply a different texture, just click a thumbnail to change the preview, and click your object again.
If you wish to apply particular scaling or animation, click [SCALE/ANIMATE] and update the previewed texture. Whatever scaling or animation is visible in the preview will be applied to the face you click. Though note that Second Life only allows one face of a prim to be animated, so if you apply an animation to one face, any existing animation on any other face on the same prim will stop.
You can do this as often as you wish. When you are finished, say the word "DONE" in chat. The script you added to the object will delete itself, but the textures you added will remain. Or the script will delete itself automatically if you do not click the object for five minutes.
The floating text with the instructions will disappear when the script does, and if there was any floating text there originally, it will be restored.
If you find that when you click a child prim, no texture is applied, it is possible that the prim contains a script which is "capturing" the click. Edit the prim in question, and temporarily move any scripts it contains to your inventory: you can replace them once you have finished texturing.
Click [SETTINGS] to display your organiser's settings menu:
    Please choose new settings and RESET!
    (NOTE: New settings will not be applied until reset.)

    Mode: Organiser
    Size: 180cm rezzed, 100% as HUD
    Browse access: Anyone
    Report access: Owner
    Take access: Owner
    Manage access: Owner

    [RESET!] [Mode]
    [Rezzed Size] [HUD Size] [Browse]
    [Report] [Take] [Manage]
Click [Mode] to set your organiser into one of three modes: organiser, texture giver, or vendor. (See "Using Your Organiser As A Public Giver Or Vendor" below.)
Click [Rezzed Size] to change the height of the organiser when it stands rezzed on the ground. This can range from 90cm to 990cm.
Click [HUD Size] to change the height of the organiser when worn as a HUD, from 50-100%. At 100%, the organiser will take up most of your screen.
Click [Browse], [Report], [Take], or [Manage] to control who may use your organiser while it is rezzed.
Browse access determines who can look through your textures - who can click to open folders, preview textures, and so on.
Report access determines who can click the "REPORT FOLDER" and "REPORT TEXTURE" buttons explained above. Note that both of these buttons will report the UUID or "key" of a texture, which will allow anyone to use scripts to apply the texture to an object, so you may wish to restrict access to the reports.
Take access determines who can get free copies of the textures in the organiser, by clicking "GIVE TO ME", or while the organiser is in "giver" mode.
Manage access determines who can move, copy, or delete textures.
Remember that none of the changes you make to your settings will take effect until you click [RESET!].
All of the documentation above describes your organiser working in its normal "organiser" mode.
However, you can rez your organiser, and switch it into a "giver" mode, which allows residents to browse the textures, and take them for free, or "vendor" mode, to sell them.
In giver and vendor modes, the panel of 25 buttons is hidden, and replaced with a sign. In giver mode, this says "click to receive a free copy of this texture": in vendor mode, "click for information & price, right-click & "pay" to buy". Selecting multiple thumbnails is also disabled: residents may simply click the folders to open them, the thumbnails to preview them, and the preview to either receive a texture, or receive information about the texture for sale, as appropriate to the mode.
To change your organiser's mode, click the [SETTINGS] button to display its settings menu, and then the [Mode] button on that menu. You will see this:
    Mode: Organiser

    Please set organiser's mode when rezzed.
    Click [Organiser] to work normally.
    Set price to L$0 to give free textures.
    Set price above L$0 to sell textures.

    NOTES:
    * HUDs are always in organiser mode.
    * Price only applies when texture includes
      no specific price: eg. "Sunset L$99"
    * All textures, even with individual prices,
      are free in giver mode, or via GIVE TO ME.
    * Access rules ignored in vendor mode:
      anyone may buy textures.

    [<BACK] [Organiser] [L$0]
    [+L$1] [+L$10] [+L$100]
    [-L$1] [-L$10] [-L$100]
Click [Organiser] to select the normal organiser mode.
Click [L$0] to select giver mode.
Note that the giver mode is restricted by the "take access" you set (see "Changing Your Organiser's Settings" above). If "take access" is set to "anyone", then any resident may click to receive a copy of a texture. If "group", then only members of the group to which the organiser is set may take textures. And if "owner", then only *you* will be able to take them.
Click the [+L$...] and [-L$...] buttons to set a non-zero price to select "vendor" mode.
The price asked by the vendor for a texture will usually be whichever price you set here. But if you wish to individually price any textures, simply change their names so that they end in their price like this:
A picture of a horse L$99
Whenever this texture is shown in the preview window, the sale price will be L$99, regardless of the normal price you have set for your textures.
When the organiser is in giver or vendor modes, the buttons are hidden, so you will not see the settings button. But if you click the sign above the preview (where the buttons would usually be), the settings menu will pop up, so you can change its mode back to organiser if you wish.
Note that whenever you are wearing your organiser as a HUD, it will always be in organiser mode. Giver and vendor modes only ever appear on rezzed organisers.
Click the [HELP] button to get basic help on using the organiser. It will show the following menu:
    HELP CONTENTS (page 1/24)

    [REZZING] Rezzing/wearing your organiser
    [ADDING] Dropping in textures
    [BROWSING] Looking through textures
    [SEARCHING] Selecting & searching
    [SCALE/ANIM] Scaling & animating
    [APPLYING] Applying textures to your builds
    [MANAGEMENT] Managing folders & textures
    [TRANSFERS] Copying between organisers
    [MODE] Using your organiser as giver or vendor
    [BUTTONS] The 25 organiser buttons
    [ABOUT] About your Bright Texture Organiser
[Rezzing] [Adding] [Browsing]
[Searching] [Scale/anim] [Applying]
[Management] [Transfers] [Mode]
[Buttons] [About] [Next Page>]
Each page shows a summary of the information in this manual, and there are 24 pages in all. You can click the buttons to jump to specific help topics (like [Adding]), or click [Next Page>] at the bottom of each page to read them in sequence.
NOTE: This section is purely for programmers writing scripts for objects they wish to interface with the Bright Texture Organiser. Please feel free to ignore it unless you need to do this.
You can write scripts which can collect information from the Bright Texture Organiser using a simple API.
The organiser will reply to chat messages sent by scripts inside objects which belong to you: though not to anyone else. The message channel may be calculated like this:
bto_channel = llHash("BTO" + (string) llGetOwner());
Then, to check for the presence of a BTO in the region, tell it to say hello:
llRegionSay(bto_channel, "SEND BTO HELLO");
Any BTO, including your HUD, will respond to the object sending this message, on the same channel, with:
"RECEIVE BTO HELLO".
Similarly, you can ask a BTO for data on its currently previewed texture like this:
llRegionSay(bto_channel, "SEND BTO PREVIEW");
It will reply with a CSV containing 12 values:
    "RECEIVE BTO PREVIEW", texture, texgen,
    repeats, offsets, rot_radians,
    anim_flags, size_x, size_y, start, length, rate
To try the API for yourself, rez your organiser, then create a cube, create a script inside it, and paste in the following code. Then click the cube to apply the currently previewed texture to the top face, preview a different texture on the BTO, and click the cube again to apply the new one.
    integer bto_channel = 0;

    default
    {
        state_entry()
        {
            llSetText("Click to rip texture from BTO!", <1.0, 1.0, 1.0>, 1.0);

            // Listen on BTO's API channel.
            bto_channel = llHash("BTO" + (string) llGetOwner());
            llListen(bto_channel, "", NULL_KEY, "");
        }

        touch_start(integer number)
        {
            // Request previewed texture data from BTO.
            llRegionSay(bto_channel, "SEND BTO PREVIEW");
        }

        listen(integer channel, string name, key source, string message)
        {
            if (llGetOwnerKey(source) == llGetOwner()
                && llSubStringIndex(message, "RECEIVE BTO PREVIEW") == 0)
                {
                // Extract previewed texture data from the BTO's message.
                list data = llCSV2List(message);
                string texture = (key) llList2String(data, 1);
                integer texgen = (integer) llList2String(data, 2);
                vector repeats = (vector) llList2String(data, 3);
                vector offsets = (vector) llList2String(data, 4);
                float rot_radians = (float) llList2String(data, 5);
                integer anim_flags = (integer) llList2String(data, 6);
                integer size_x = (integer) llList2String(data, 7);
                integer size_y = (integer) llList2String(data, 8);
                float start = (float) llList2String(data, 9);
                float length = (float) llList2String(data, 10);
                float rate = (float) llList2String(data, 11);

                // Apply the texture to this prim.
                llSetLinkPrimitiveParamsFast(LINK_THIS,
                    [PRIM_TEXGEN, 0, texgen,
                    PRIM_TEXTURE, 0, texture, repeats, offsets, rot_radians]);

                // Apply the animation.
                llSetTextureAnim(anim_flags, 0,
                    size_x, size_y, start, length, rate);
            }
        }
    }
Note that if you have more than one organiser rezzed in the region, they will all hear "SEND BTO PREVIEW", and all send replies. So using the sample script above, when you click, all of their preview textures will be applied one after another, and only the texture in the message which happened to arrive last will remain on the prim.
To avoid this, if you know the UUID of the BTO you wish to interface with, use llRegionSayTo(). If you don't, use llRegionSay(btos_channel, "SEND BTO HELLO") to get replies from them all, and choose one.
* Use multiple organisers for different kinds of texture, and give them meaningful names! For instance, instead of one organiser with a long list of folders, create several organisers with names like "Nature BTO", "Buildings BTO", and "Clothes BTO". Putting "BTO" in their names makes it easy to search for all the organisers in your inventory.
* Don't put too many textures in a folder. There is no fixed limit, and the organiser can in principle store thousands of textures in a single folder, but if you have more than a few hundred, it will become inconvenient to scroll through all the thumbnails to find the one you are looking for. Instead of having a "materials" folder with thousands of textures including rusted steel, gold, oak, pine, cotton, and so on, split them up into different folders for "metals", "wood", and "fabric".
* The first texture in each folder - when sorted alphabetically by name - will provide the picture which appears on the folder in the organiser, so choose a texture which represents the folder well, and change its name by putting an exclamation mark ("!") at the beginning. This will cause Second Life to sort it to the top of the list, and make it the "icon" for the folder.
* Give your textures descriptive names to make them searchable! If a texture shows yellow wallpaper, but is called "Room texture 117", a search for "WALLPAPER" won't find it. Rename it to "Room texture 117 - yellow wallpaper".
* If you accidentally drop textures into the wrong folder, click [SPECIAL SELECT], and then [TODAY], to select all textures added to that folder on today's date. That way, you can quickly identify those that you've just added by mistake. (If you've already added some today, those will be selected as well, but it will still reduce the number you have to look through to move those you need to move to the correct folder.)
* If you are rezzing your organiser in public, especially as a giver or vendor, choose the first texture in the first folder carefully, as this will be the one shown most of the time as people walk by. People may browse to show other textures, but they might leave it previewing the useful but dull "100% grey" texture. So, when no one is within 20m, the organiser will quietly reset itself to show the first texture in the first folder again.
* During some long operations - searching for duplicates, or moving or copying large numbers of textures - the organiser will display a "PLEASE WAIT" message in floating text. If it is taking longer than you expected, and you are keen to stop it, click the organiser. You will be asked if you wish to abort the process. Click "No" to let it continue, or "YES, STOP!" to stop the process: though do bear in mind that if it was moving, copying, or deleting textures at that moment, that job will be left unfinished. Only you as the owner can abort a process in this way: the organiser will ignore clicks from anyone else until it has finished.
* If you have folders you use frequently, give them names which put them at the top of the alphabetical list. If they are near the top, you can scroll the folder list to find them easily by clicking the double up-arrow on the scroll bar, and they will appear as individually named textures on the top level of the folder menu (rather than in a submenu). So if you have an "in tray" folder for unsorted textures you've just received, change its name to "1n tray", or "! in tray".
Shan Bright
Chief Executive Officer