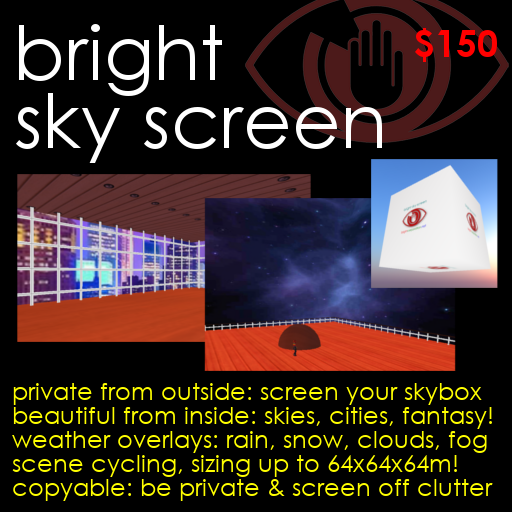
Privacy cube, each side 16-64m, 121 scenery backdrops, animated weather, & more!
In Second Life, as we can fly, and build in mid-air, many of us choose to live in the sky.
"Skyboxes" can offer more privacy: but if someone builds something near us, it can feel even more intrusive than a neighbour on the ground.
The Bright Sky Screen solves this. It is a huge box, large enough to surround your entire skybox, blocking the view from outside, and displaying your own choice of backdrop - clouds, stars, countryside, cities, fantasy scenes - inside.
To use it, rez it, position the centre, and then double-click to display this menu:
Scenery: Clouds/Clouds 1
Weather: Clear
Visible: Yes
Bright: Yes
Cycle: No cycle
Size: 16m x 16m x 16m
Position: 1.99/1.71/4006.95
Exterior: Original

Please click below to change these settings.

[Scenery] [Weather]
[Visibility] [Brightness] [Cycling]
[Size] [Position] [Exterior]
Click [Scenery] to change the scene inside the screen. A menu of 11 categories will appear - [Clouds], [Nightsky], [Natural], [Rural], [Urban], [Fantasy 1], [Fantasy 2], [Fantasy 3], [Abstracts], [Various]. Click one of these for a submenu of 11 scenes, and choose one. There are (11x11) 121 scenes in all.
Click [Weather] for an optional, translucent, animated weather overlay. A submenu will offer [Clear], [Rain], [Fog], [Cloud], and [Snow]. You can also click [Faster]/[Slower] to change the animation speed, or [Stronger]/[Weaker] to change its opacity.
Click [Visibility] to show or hide the scenery. If it is hidden, you will see the world outside, but the sky screen will still block the view from the outside.
Click [Brightness] to switch the scenery's brightness (in SL terms, "fullbright") on and off. If bright, colours will look as bright during the SL night as they do during the day. If not, they will darken as the sun sets.
Click [Cycling] to have the scenery change to a new, randomly chosen scene, every hour. A submenu will appear, from which you may choose [No Cycle], [Limited/hr] to select new scenes only from the 11 in the same category as the current scene, or [Random/hr] to choose randomly from the entire set of 121 scenes.
Click [Size] to resize the screen. A submenu will appear allowing you to change the X, Y, and Z dimensions, in 4m steps, to between 16-64m.
Click [Position] to adjust the screen's position. From the submenu which appears, click [Snap to 1m] to move the centre of the screen to the nearest whole number XYZ coordinates (so a screen at 33.2/29.97/107.03 snaps to 33/30/107). Then click [East 1m], [West 1m], [North 1m], [South 1m], [Up 1m], or [Down 1m] to nudge the screen 1m in the chosen direction.
Click [Exteriors] to set the screen's outside texture. A submenu will appear offering [Original], [White], [Black], [Invisible], [Dark sky], and [Night sky]. If you choose [Invisible], those outside the screen will be able to see inside.
The screen will always be 10cm smaller than the chosen size in each dimension. For instance, if a screen's X and Y dimensions are both set to 32m, the screen will actually measure 31.9m x 31.9m. This is done so that if it is placed at the centre of a 32m x 32m parcel, a few centimetres gap is left between the screen and the parcel boundary on all sides.
Experimentation has shown that if a prim exactly touches a boundary - even without crossing it - it can sometimes be returned by the owner of the neighbouring parcel. Making the screen imperceptibly smaller avoids this danger.
Shan Bright
Chief Executive Officer