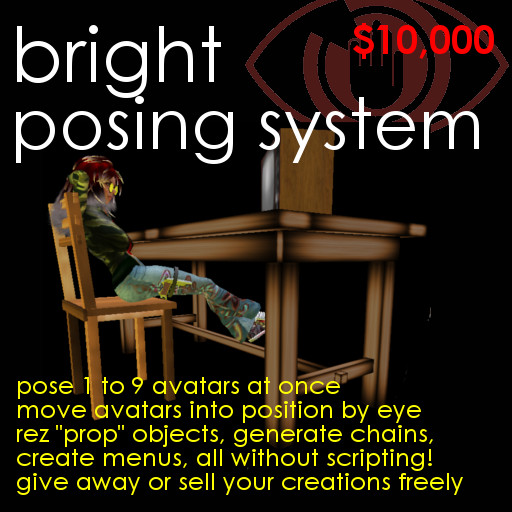
Pose up to 9 avatars, rez props/chains & menus: no scripting! Sell your builds!
The Bright Posing System will seat avatars on the products you create. It can offer a single avatar one or more menus, each carrying up to nine poses, or seat nine avatars in separate poses, or place up to nine avatars in synchronised "pose sets" (such as a mutual embrace) and let them switch to other pose sets. The total number of poses is limited only by script memory, which doesn't usually get full until you've defined over 80.
BPS will also rez props or "toys" when particular poses are chosen, and even rez chains to LockGuard compatible collar, wrist, and ankle cuffs if they are wearing them. You can even run chains to the toys!
Unlike other systems, it doesn't rez ugly "pose balls", need an extra script for each avatar you wish to sit, or require separate prims to act as seats. If you wish to allow nine avatars to sit on your one-prim bench, BPS lets you do it, with just two scripts.
And you can do it without writing a line of script yourself. Just note down the details of each pose - such as the avatar's position and animation - in a settings notecard (this manual explains how), drop this into your build along with your two BPS scripts, and your product is ready for use: or for distribution, as the scripts are copyable and transferable.
On the other hand, if you are a scripter, and *want* to add your own scripts to do things when avatars sit down and stand up, BPS will send "link messages" to your scripts to tell them when this happens.
BPS even lets you experiment until you've found the best place for each pose. Just sit on your product, select "adjust" from the menu, and you can nudge the X, Y and Z of your position and rotation up and down. Your avatar will move instantly to let you see the effect: and rezzed toys will move in the same way. When everything looks right, BPS will tell you exactly the line of text you need to paste into your settings notecard to make the change permanent.
And once your product is finished, you can give it (or sell it) to anyone: the scripts are copyable and transferable. (Though please note: BPS IS ONLY LICENSED FOR USE IN PRODUCTS YOU CREATE YOURSELF!)
In short, BPS handles the mechanics of posing avatars, and allows you to focus on building fun, beautiful, interactive products!
First, find the object "Bright Posing System boxed" in your inventory, and drag it into the ground to rez it. Right-click the box to display its context menu, click "Open" to show its contents window, and click the "Copy to Inventory" button you will see at the bottom.
This will create a new folder in your inventory called "Bright Posing System boxed", which will contain the following items:
[Bright Posing System] LICENSE box
[Bright Posing System] MAIN script
[Bright Posing System] POSING script
[Bright Posing System] SETTINGS
[Bright Posing System] TOY script
BPS Sample 1: Chair (single avatar demo)
BPS Sample 2: Bench (multi avatar demo)
BPS Sample 3: Bed (pose sets demo)
BPS Sample 4: Dance floor (menus demo)
BPS Sample 5: Desk (toys demo)
BPS Sample 6: Dungeon (chains demo)
Bright Posing System note
The sample products have been designed to demonstrate the features of BPS. Rez them and give them a try: just click to sit, and click again for the poses menu. Inside each you will find a settings notecard which will let you see how the features are set up.
Rez the LICENSE box and click it. You will hear something like this:
[12:21] Object: Paste this at top of your settings notecards:
LICENSE 21d60fe82b218c673ba6c2a216a5744e028d73d1
You will need to paste this line into the top of each settings notecard you create with BPS.
The easiest way is simply to edit the SETTINGS notecard in your inventory, and paste it in, so it will look something like this:
! Simple BPS settings notecard
LICENSE 21d60fe82b218b673ba6c2a216a5744e028d73d1
POSE Sit, POS 0/0/50
Then drop this into new products as a template to which you can add your poses.
1. Create a cube - the classic Second Life plywood box.
2. Right-click it and click "Open", to display its contents window.
3. Drop in the SETTINGS notecard (with the LICENSE line already pasted in).
4. Drop in first the POSING script, then the MAIN script. You will see:
Bright Posing System: Restarting...
Bright Posing System: Script 1 of 2 ready (24076 bytes free)
Bright Posing System: Script 2 of 2 ready (14460 bytes free)
5. Right-click your cube, and click "Sit Here".
And that's it! You are now sitting on your own cubic chair: and it's ready to give to your friends, and sell!
But it's not very exciting. It only offers one pose. It uses the default Second Life "sit" animation. And it leaves you floating about 25cm above the surface.
However it works, and it illustrates how to install BPS. Creating a more interesting variety of poses is now a matter of editing the SETTINGS notecard, and the rest of this manual explains how to do that. It's a little long, because it explains it all in detail, with advice and examples, but it's worth reading through, and keeping for reference. The settings notecard is designed to be easy to write, and in no time it'll become second nature.
(Incidentally, BPS will treat the first notecard with a name beginning "[Bright Posing System]..." it finds in the prim as its settings card, so it is possible to give your settings cards different names, and even keep a library of them in your inventory.)
Before you install BPS into something more complicated than a cube, there are a few preparations you can make which will make life much easier:
1. Turn your object so that the front faces EAST - the positive direction along the X axis. (If you're not sure which direction EAST is, just right-click your object, click "Edit", and make sure the coordinate system in the edit window is set to "World", rather than "Local" or "Reference". The red arrow through the object will be pointing east.) It will make it easier to understand the impact of position and rotation changes if X means "forward/east", Y means "left/north", and Z means "up", relative to your object. (Ideally - and if possible - create the object so that the root prim has zero rotation (X=0, Y=0, Z=0) when the front of the object faces east: but don't worry if you cannot, this is not essential.)
2. If you plan to run chains from cuffs worn by avatars posing on your product to its prims, edit the names of those prims to make them simple, descriptive, and unique. For instance, if you plan to run chains from an avatar's left and right wrist cuffs to two torus shaped loop prims, call them "left loop" and "right loop". Make sure the names don't contain commas.
3. If you wish to use any animations apart from the standard Second Life "sit", drop the animation items into the root prim of your product, and again, edit them to give them short, simple, clear names. For instance, if your product is a bed, you might call the animations "lie on back", "lie on side", and "sit up". Again, no commas.
4. If you wish to rez props or "toys" when avatars move into certain positions, rez the toys, give them simple names, without commas, and drop the TOY script into each. Then take them back into your inventory, and finally drop them into the root prim of your product.
5. Make sure the product is finished. It's easier to change it now than to set up all your poses, then change the product and have to adjust the poses accordingly.
6. Remember that all toys must be modifiable (so you can drop in the TOY script), and copyable (so BPS can rez them). If you plan to give away or sell your product, all the toys - and animations - must be copyable and transferable.
It's hard to persuade people to prepare carefully, but these steps really will make installing BPS much simpler. Once you are sure you have done them all, just follow the same steps you did with the cube above to install BPS.
Your product now has one simple pose. To adjust this, and add more, you must edit the SETTINGS notecard.
Each line in the SETTINGS notecard consists of one or more keyword/value pairs separated by commas, for instance:
POSE Pose 1, POS 0/0/50, ROT 0/0/180
Here, the keyword "POSE" has the value "Pose 1", "POS" has the value "0/0/50", and "ROT" the value "0/0/180". (The meaning of these keywords is explained below.)
You can miss out any keyword except the first, and it will be given a "default" value. For instance, missing out the POS keyword has the same effect as writing POS 0/0/0.
All coordinates are in centimetres (so 50 represents 0.5m), and all angles in degrees (so 180 is a half turn).
You may use blank lines in your SETTINGS notecard: BPS simply ignores them.
You may also add titles or comments, prefixed by exclamation marks, as BPS ignores these too. For instance:
! These settings created by Shan Bright.
In step 1 above, you will have turned your object so that the front faces east - the positive X direction.
Now right-click the object, click "Edit", and click the "Object" tab to see the root prim's rotation. Ideally, you will have created the object so that when the front faces east, the object has zero rotation: X=0, Y=0, and Z=0. But if not, BPS can allow for this.
Say you discover that when the front faces forward, the root prim rotation is X=0, Y=0, Z=180. Put the following line into SETTINGS:
BASIC-ROT 0/0/180
As long as BASIC-ROT has been set to the rotation of the root prim when the object faces east, BPS will treat all X coordinates as forwards/backwards, Y as left/right, and Z as up/down.
Each line beginning with "POSE" in the SETTINGS notecard defines a pose. You saw one above:
POSE Sit here, POS 0/0/50
A basic POSE line takes this form:
POSE button, ANIM animation, POS x/y/z, ROT x/y/z
Remember, as with all lines in your settings notecard, you can leave out any POSE line keywords except the first, and they will be assigned "default" values. For instance, missing out the "POS" keyword has the same effect as writing "POS 0/0/0".
The keywords are:
POSE button: Defines the text which will appear on the menu button. Second Life only displays up to 12 characters on a menu button.
ANIM animation: The name of the animation, either "sit" for the normal Second Life sit pose, or the name of an animation item in the root prim. Defaults to "sit".
POS x/y/z: Positions the avatar's hips, *relative to the root prim*, and *in centimetres*. Defaults to "0/0/0".
ROT x/y/z: Rotates the avatar about the X, Y and Z axes. All the angles are in degrees. Defaults to "0/0/0".
To offer a user a choice of poses, simply add more POSE lines, up to a total of nine. For instance, to offer four poses, each facing in a different direction...
POSE Face ahead, POS 0/0/50
POSE Face left, POS 0/0/50, ROT 0/0/90
POSE Face back, POS 0/0/50, ROT 0/0/180
POSE Face right, POS 0/0/50, ROT 0/0/270
A "toy" is a prop or object which BPS rezzes when an avatar selects a particular pose. You can specify a toy by adding the following keywords to your POSE line:
TOY object, TOY-POS x/y/z, TOY-ROT x/y/z
TOY object: Rezzes "object" from your product's root prim. (As explained above, these objects should contain the BPS TOY script.)
TOY-POS x/y/z: Determines where the object will be rezzed, *relative to the root prim*, and in centimetres. So for instance, 100/0/100 will rez the toy 1m forward and 1m above the root prim of the object. Defaults to "0/0/0".
TOY-ROT x/y/z: Rotates the rezzed toy: all angles in degrees. Defaults to "0/0/0".
For instance, if your product is a sofa, you may decide to offer "Sit" and "Lie down" poses, and rez a pillow if an avatar chooses to lie down. The setting would look something like this (note that in this example, the pillow will have the default "0/0/0" rotation):
POSE Sit, ANIM slouch sit, POS 0/0/50
POSE Lie down, ANIM lying down, POS 0/0/55, ROT 90/0/0, TOY pillow, TOY-POS 0/75/55
Many avatars wear cuffs on their wrists and ankles, and sometimes collars - and most of these use "LockGuard" scripts. If you wish, BPS will create particle-based "chain" effects between your product's prims, and LockGuard cuffs. To do this, add the following keywords to your POSE line:
...COLLAR prim, L-WRIST prim, R-WRIST prim, L-ANKLE prim, R-ANKLE prim
In each case, "prim" is simply the name of one of your product's prims, or the word "Root" for the root prim.
If you were building a dungeon, you might choose to add some metal loops to the wall to chain your prisoner's wrists, and to offer two poses: one for a visitor, the other for the prisoner:
POSE Visitor, ANIM casual stand, POS 0/0/100
POSE Prisoner, ANIM arms over head, POS 0/250/100, L-WRIST loop1, R-WRIST loop2
If a particular pose rezzes a toy, you can also chain cuffs to the prims in the toy, rather than the prims in the product itself. To do this, use the names of prims in the toy, prefixed by a "*" (or "*Root" for its root prim). For instance, this pose rezzes a "metal ball", and chains the prisoner's right ankle to a prim called "ball loop" in the metal ball object.
POSE Prisoner 2, ANIM floor sit, POS 100/0/55, TOY metal ball, TOY-POS 120/0/30, R-ANKLE *ball loop
When you names prims from your product, BPS will validate these before it runs. However, it cannot validate the prim names in your toys, so if you get a *prim name wrong, no error message will appear - the chain will simply not be generated when the toy appears. Double check these if chains to toys fail to materialise.
Note: For some reason, while almost all Second Life cuffs use the "Lockguard" protocol, very few collars do, so you may find chains to avatars' necks don't appear. Our own, free "Bright Collar" does support Lockguard, as well as all the features of other "Open Collars": you can collect one at the Bright AdultShop.
By default, BPS will only allow one avatar to sit on your product at once: but you may allow more by adding this line:
MAX-SITTERS number, ALLOW-SWAPS yes|no
MAX-SITTERS number: Controls the maximum number of avatars who may sit at once. The default is 1, so if you don't specify MAX-SITTERS, only one avatar may sit on the object. The maximum is 9. You must create at least one POSE per possible avatar - though you can create more, if you wish to offer a wider choice of poses.
ALLOW-SWAPS yes|no: Determines whether an avatar will be allowed to switch to another pose even if someone is already occupying it - effectively forcing them to swap places. This defaults to "no", as you don't want (say) one person sitting on a bench to be able to force another person - possibly a stranger - to swap places with them. However, a couple lying on a bed would probably welcome the freedom to easily swap places.
(Note: to make setting up and testing your settings easier, you will *always* be able to force other avatars to swap with you when using BPS on objects you have created yourself.)
The base position - from which BPS measures the positions of every avatar and toy - is usually the centre of the root prim.
However, sometimes, it may be more convenient to choose another base. For instance, you may wish to have four poses, all positioned on the top of the bench, 50cm above the centre of the root prim. You could give each pose a POS with a Z coordinate of 50 - 0/0/50, 100/0/50 and so on - or you could just change the base position to be 50cm higher.
To do this, you need to add a BASE-POS after your BASE-ROT (which was explained above):
BASE-ROT x/y/z, BASE-POS x/y/z
If you didn't put in a BASE-ROT (because your object is at zero rotation when it faces east), but you want to a BASE-POS, just use BASE-ROT 0/0/0...
BASE-ROT 0/0/0, BASE-POS 0/0/50
Also, if you plan to offer your object with mod rights, or it contains a sizing script, bear in mind that the user may change the size of the object and thereby invalidate all your carefully positioned poses. BPS can automatically adjust positions to allow for resizing if you tell it how big you are *assuming* the object is, using the BASE-SIZE keyword. Edit the object, and look at the Z size of the root prim. If it is (say) 1 metre, add:
BASE-ROT 0/0/0, BASE-SIZE 100
When BPS runs, if the root prim has been resized to 2 metres, it will double all the coordinates in your settings automatically, so they should still correspond to the same points on the object.
Use this line to enable or disable this feature:
CLICK-TO-SIT yes|no
If you wish to allow avatars to sit on your product simply by clicking it, set this to "yes". If you prefer that they should have to right-click and select "Sit Here", set it to "no" - or just leave the line out, as it defaults to "no".
Second Life objects have a built in "sit target", where avatars are positioned when they sit.
If the object uses BPS, the avatar is normally moved from there to the appropriate POS so quickly that you will barely notice the sit target, so it does not matter. The only exception is when an avatar tries to sit on an object which is already full - with as many avatars as MAX-SITTERS allows.
In this case, they are "unsat", and left at the sit target: so the sit target essentially controls where such avatars are left.
The default is 0/0/1 - 1cm above the centre of the root prim. This is usually fine, but if you have problems with ejected sitters landing awkwardly, try changing it to a point away from the product, using:
SIT-TARGET x/y/z
You *can* set the product's sit target to 0/0/0, but if you do, Second Life will disable the sit target feature altogether. This means that avatars will not be moved if an attempt to sit fails, but it also means that Second Life doesn't regard the object as a seat, and is more inclined to generate the "no room to sit here" message on sit attempts (which you will probably have seen sometimes). Our advice is *not* to use 0/0/0.
If you are creating a double bed, you may wish to allow avatars to lie side by side, or cuddle, so set up the following POSE lines:
MAX-AVATARS 2, SWAP yes
POSE Lie on left, ANIM lie on back, POS -150/0/50
POSE Lie on right, ANIM lie on side, POS 150/0/50
POSE Cuddle, ANIM cuddle someone, POS -40/0/50
POSE Be cuddled, ANIM be cuddled, POS 40/0/50
So if one avatar selected pose "Cuddle", and the other "Be cuddled", they could cuddle. But it's awkward. If one chose "Cuddle" while the other was still in pose "Lie on right" - they would be left with their arms around empty air. Essentially, "Lie on left" and "Lie on right" are meant to be used together, and "Cuddle" and "Be cuddled" are meant to be used together.
You can indicate this by adding a line in the form "POSE-SET button", where "button" is the text which will appear on a menu button which allows the *set* of poses to be chosen at once. For instance, the poses above could be divided into two pose sets:
MAX-SITTERS 2, SWAP yes
POSE-SET Lying down
POSE Lie on left, ANIM lie on back, POS -150, 0, 50
POSE Lie on right, ANIM lie on side, POS 150, 0, 50
POSE-SET Cuddling
POSE Cuddle, ANIM cuddle someone, POS -40, 0, 50
POSE Be cuddled, ANIM be cuddled, POS 40, 0, 50
Now, the avatars begin in the first pose set - lying down. They can switch between poses "Lie on left" and "Lie on right", or they can switch to joint pose "Cuddling", which will move them to "Cuddle" and "Be cuddled" at the same moment.
There are two rules to bear in mind when using pose sets:
1. No POSE lines may appear before the first POSE-SET line.
2. Every POSE-SET must contain enough POSEs to accomodate all MAX-SITTERS at once.
You can also use an additional keyword SWITCH-TO-POSES:
POSE-SET button, SWITCH-TO-POSES yes|no
Normally, a selection of pose sets appears on a single menu. Selecting one pose set redisplays the same menu, allowing a user to quickly switch between different pose sets. This is what happens if SWITCH-TO-POSES is "no", or if it is just omitted.
However, if SWITCH-TO-POSES is "yes", selecting a pose set drops the user into a menu showing the individual poses *within* the set. This is useful if you are using pose sets simply to get round the maximum of nine ordinary poses. For instance, if you have created a single seater chair with 18 poses, you might create a settings card like this:
POSE-SET Some Poses, SWITCH-TO-POSES yes
POSE Pose 1...
...
POSE Pose 9...
POSE-SET More Poses, SWITCH-TO-POSES yes
POSE Pose 10...
...
POSE Pose 18...
This means that when an avatar sits down, they'll first be offered a menu of the 9 poses in the "Some Poses" pose set. However, if they click "Pose Sets", they'll be offered a choice of "Some Poses" and "More Poses", and if they then select "More Poses", instead of being offered this choice again, they'll be offered a menu of all the poses within the "More Poses" set.
Note: there is no fixed limit on the number of pose sets you can create: the only limit is the amount of memory in the script. In testing, settings cards with 40 pose sets of 2 poses each (80 poses in total - all with chains and toys) were found to work. You will be able to add even more if they don't all have toys and chains. Second Life generates the cryptic message "Stack/help collision" when a script runs out of memory: if this happens, you may need to trim your settings notecard down.
When a sitting avatar clicks your product, they will see a menu which displays a choice of poses within the current pose set. There will also be a "POSE SETS" button, which will automatically display another menu, with a list of all the pose sets.
This menu can only display 9 pose sets, and only in the order they appear in the SETTINGS notecard. But you can set up your own system of menus and submenus by adding MENU lines:
MENU name, BUTTONS button1; button2; button3...
Each button is either the name of a pose set, or of another menu. So for instance, you might offer a set of dance joint poses for couples, and create the following menus:
MENU Main, BUTTONS Modern; Ballroom
MENU Modern, BUTTONS Disco; Rave; Heavy Metal
MENU Ballroom, BUTTONS Waltz; Latin
MENU Disco, BUTTONS Disco 1; Disco 2; Disco 3
MENU Rave, BUTTONS Rave 1; Rave 2; Rave 3
MENU Heavy Metal, BUTTONS Heavy 1; Heavy 2; Heavy 3
MENU Waltz, BUTTONS Waltz 1; Waltz 2; Waltz 3
MENU Latin, BUTTONS Latin 1; Latin 2; Latin 3
In this example, "Disco" is a menu name, while "Disco 1" is a pose set (say, with "Dancer 1" and "Dancer 2" poses for a couple).
NOTE: The button names in a MENU line are separated by ";" SEMICOLONS!
Each MENU can carry up to 9 buttons, limited to 12 characters so that they will fit on Second Life menu buttons.
Using custom menus, you can create a SETTINGS notecard with as many pose sets as you wish. The only limit is the memory capacity of the scripts. The exact number of poses the BPS system can manage will depend on many factors, including their use of toys, chains and so forth, but in testing, SETTINGS with 80 poses, most using chains and toys, worked well.
If your poses use chains, BPS will generate medium width chains with steel links. However - purely if you wish - you can fine tune their appearance by adding the following line to your SETTINGS notecard:
CHAIN texture, HEIGHT h, WIDTH w, LIFE l, GRAVITY g
CHAIN texture: This determines which texture is used in the particles. "texture" can be the key or UUID of a texture item, or the word "chain" or "rope". The default is "chain".
HEIGHT h: The height of each particle in millimetres. The default is 5.
WIDTH w: The width of each particle in millimetres. The default is 10.
LIFE l: The time each particle takes to travel from cuff to prim, in tenths of a second. The default is 15.
GRAVITY g: A number determining how far the chain will sag under the influence of gravity. The higher the number, the greater the sagging: a chain with GRAVITY 0 will run straight. The default is 3.
These parameters are all part of the Lockguard system. The best way to understand them is to try different values and see their effects.
Though reading about the various statements may seem daunting at first, after you've defined one or two SETTINGS notecards, you'll find the process simple. The only really tricky part is getting the position and rotation of the avatars and toys exactly right.
To do this, you really need to see the avatars sitting on the your product, and then use trial and error to adjust coordinates until they look right. You could do this by editing the SETTINGS notecard, saving each change, and then sitting on the object each time to measure the effect, but this is a bit cumbersome.
Because of this, BPS has a menu system built in, which allows you to easily adjust coordinates while avatars are sitting on the product, and see the effects immediately. So our advice is not to worry about the POS and ROT settings when you create the original settings notecard. Put in very rough values (or even just 0/0/100, to position an avatar up above the root prim), and then use this system to move the avatars into place.
Just sit on your product (and have friends sit in other poses if you wish to line up avatars with each other), and click the product to display the poses menu. You will see an "ADJUST" button. (Note that this button will only appear for you, the object's owner and creator.) Click it to display the following menu:
***** POSE Watch TV *****
Setting X value of POS...
POS **75**/-75/160, ROT -90/0/60
TOY-POS 120/-150/100, TOY-ROT 90/0/0
[Set ROT] [Set TOY-POS] [Set TOY-ROT]
[Set Y] [Set Z] [Done!]
[POS+1x] [POS+5x] [POS+25x]
[POS-1x] [POS-5x] [POS-25x]
You can use this menu to change your current poses POS and ROT, and (if the pose uses a toy) the TOY-POS and TOY-ROT values.
To begin with, you are changing the X value of the POS - the avatar's position. Note the "**" marks around that coordinate in the menu. Click (say) [POS+5x] to move the avatar 5cm forward along its X axis. You will see the avatar move immediately - or, if you are changing your toy's settings, you will see the toy move.
To change which coordinate you are changing, click [Set X], [Set Y] or [Set Z].
To change which keyword you are changing, click [Set POS], [Set ROT], [Set TOY-POS], or [Set TOY-ROT].
When you have finished all your changes, click [Done!]. You will see the following message:
Paste this line into your settings notecard:
POSE Watch TV, ANIM slouch, POS 75/-75/160, ROT -80/0/60, TOY television, TOY-POS 120/-150/100, TOY-ROT 60/0/0
This is the line you need to paste back into your settings notecard - replacing the current "Lie back" pose line - to make your changes permanent.
You can now switch to another pose, and adjust that one: your changes to each pose will last as long as you remain sitting on the object, and don't load another pose set, so you can see the effect each change has on the others before finally updating your settings notecard.
If you wish to add your own scripts to your products, BPS will send them link messages when avatars stand up and sit down. You could, for instance, add a script to shout "Philip Linden is ready to duck!" when an avatar sits on your ducking stool. Do do this, use the LSL link_message event handler:
link_message(integer sender_prim, integer pose_number, string message, key avatar)
{
if (message == "BPS-SIT")
llShout(0, llKey2Name(avatar) + " is ready to duck!");
else if (message == "BPS-STAND")
llShout(0, llKey2Name(avatar) + " has got off the ducking stool.");
}
The link message is sent to scripts in all prims of your product. link_message will receive the following parameters:
1st (integer): The link number containing the BPS scripts.
2nd (integer): The pose number, the first pose in the pose set being 0.
3rd (string): The message, "BPS-SIT" or "BPS-STAND".
4th (key): The key or UUID of the avatar who sat or stood.
Strictly speaking, the POS you choose for each pose controls where an avatar's *hips* are placed. But there are two problems with choosing positions, which affect *all* sitting in Second Life:
1. Avatars come in a huge range of different sizes and proportions. Even if their hips were guaranteed to be in the right position, the rest of their body would be arranged differently around them.
2. In theory, sit animations should never move hips away from the normal position: just move the rest of the avatar body *around* the hips. However, many do move the hips: so its impossible to be sure which part of an animation will remain in the same place when avatars are different sizes (if, indeed, any of them do).
Because of this, Second Life poses are never perfect for all avatars. Do try your poses with a few different avatars, some taller than others, and try to minimise the gaps and overlaps, but don't worry overly if some imperfections remain: in truth, they seldom lessen the visual and emotional effect of a pose.
Shan Bright
Chief Executive Officer