The ULTIMATE vendor! Single/multipanel, double-sided, revenue splits, & more!
The Bright Multivendor is the perfect way to sell your products, or give out freebies!
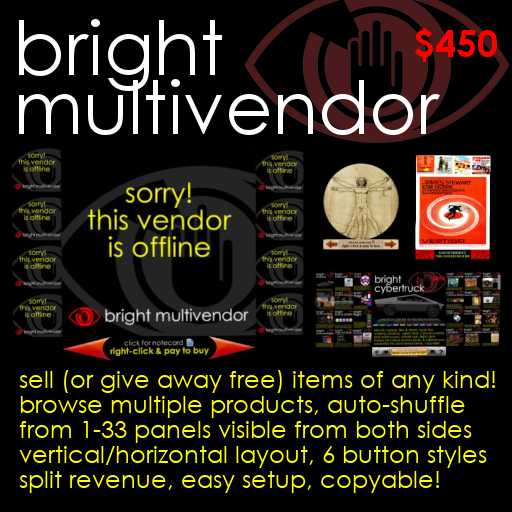
Out of the box, the vendor has a land impact of 3. A large central panel displays the main product, while two "wings" (one on either side) have four smaller panels each, displaying 9 products between them. But from the vendor's settings menu, you may choose from one panel (showing one product at a time, with a land impact of 2) up to 33 (the central panel plus eight wings), displaying 33 products at once!
All panels are double-sided, so while you can place a vendor against a wall, it can also be left free-standing, so that visitors may use it from either side.
And the number of products you can sell is not limited by the number of panels. If there are more products than the vendor can display at once, your customers can click the arrow buttons to browse through them.
While the vendor is idle, you can have it automatically shuffle different, random products onto the main panel at regular intervals.
And it is easy to set up. Just drop in your products, and for each product, a texture showing a picture of the product. For instance, drop in your product "Amazing Hat", and a texture called "Amazing Hat/L$50". The vendor will do the rest!
You may optionally add a notecard called "Amazing Hat/note", which the vendor will offer free to anyone who clicks to request more information.
When someone buys your hat, you can optionally have the vendor notify you by IM: telling you the name of the vendor, is location, the customer's name, the product they bought, and the price.
If you wish, the vendor can even automatically send a percentage of each sale to another avatar, allowing you to split the proceeds with your business partner.
A simple menu lets you configure almost every detail of the vendor and its operation. Set the main panel's longest side to from a tiny 50cm to a huge 30m. Choose square, landscape, & portrait display panels at a variety of aspect ratios. Select from six styles of control panel whichever best suits your products. Enable or disable sound effects. Cycle through a range of colours for floating text, or disable it. Whisper, say, shout, or disable product announements as each is displayed on the main panel... All configured without having to remember commands or edit notecards!
Low prim, easy setup, multi-product, single and multi-panel, auto-shuffling, information giving, sales reporting, revenue splitting... and copyable, so you may rez as many as you need!
The Bright Multivendor is the perfect way to distribute your work, give things away, or sell them: turning your creativity into profit!
Drag the box "Bright Multivendor boxed" from your Inventory onto the ground to rez it, right-click and select "Open", and at the bottom of the contents window which appears click "Copy To Inventory".
Then open your Inventory, and find the folder "Bright Multivendor boxed". Inside, you will find the vendor, and a notecard with the text you are reading now.
1. Drag your "Bright Multivendor" from your inventory onto the ground to rez it.
2. Right-click the vendor and click "Open": a "Contents" window will appear.
3. Drag each item you wish to sell from your Inventory into the vendor's Contents window.
(You must have copy and transfer rights to each - though naturally you can set any 'Next Owner' permissions you wish for your customers.)
4. Add a texture showing each item, called "(item name)/L$(price)".
For instance, if you are selling an item called "Hat" for L$10, add a texture carrying a picture of it called "Hat/L$10" (case sensitive). (If the product is free, call the texture "Hat/L$0".)
5. If you wish, add a notecard, called "(item name)/note": eg. "Hat/note" (case sensitive).
6. Optionally, add a notecard called "Information" (case sensitive), which will be act as a notecard for any item which wasn't given its own specific notecard in step 5.
The vendor will already contain three items:
~~~Bright Multivendor script 1~~~
~~~Bright Multivendor script 2~~~
~~~Wing~~~
You can ignore them. Their names begin with "~~~" so that they will usually sort alphabetically to the bottom of the contents list.
When you are adding items to and removing items from the vendor, be careful not to delete the scripts. Both are needed for the vendor to work.
The "~~~Wing~~~" object is used to add wings carrying extra display panels to your vendor (see below). The vendor will work happily without it, but will not allow you to add wings through the settings menu.
However, if you prefer to remove it, you can always replace it later by dragging one from your original boxed Bright Multivendor.
Having loaded your vendor with products, click it.
A dialog box will pop up requesting "link permission". This is required to allow the vendor to add and remove wing prims during setup. Grant this permission, and the following settings menu will appear:
Jane Doe's 'Bright Multivendor'

[SIZE]: 200cm x 200cm, [CONTROLS]: Black
[WINGS] count: 2, [LAYOUT]: Wings either side
[IDLE] after: 5 minutes, [SHUFFLE] every: 3 minutes
[SOUND]: ON, Floating [TEXT]: None
[CHAT] range: None, [IMS]: YES
Revenue [SPLIT]: NONE
Below this text you will see the following buttons:
[SIZE] [CONTROLS] [WINGS]
[LAYOUT] [IDLE] [SHUFFLE]
[SOUND] [TEXT] [CHAT]
[IMS] [SPLIT] [GO ONLINE]
[SIZE] opens the vendor's size menu: see below.
[CONTROLS] changes between the 6 control panel styles: "Black", "Steel", "Wood", "Antique", "Cartoon", and "Scifi". Just keep clicking to see each in turn, and choose whichever suits your products and setting best.
[WINGS] opens the vendor's wings menu: see below.
[LAYOUT] moves the wing prims relative to the main panel: the layout can be "Wings either side", "Wings to the left", "Wings to the right", "Wings above & below", "Wings above", or "Wings below".
(Note: if the new layout would involve moving wings so far out sideways that they would float over someone else's land parcel, Second Life may refuse to reposition them correctly. Just change layout again and, providing the wings are all over your own land, they'll be repositioned correctly.)
[IDLE] sets the period the vendor will wait after user interaction before it begins randomly shuffling its main product display. Idle times are "Never", "1 minute", "1.5 minutes", "3 minutes", "5 minutes", "10 minutes", "15 minutes", "30 minutes", or "1 hour".
We recommend a minimum of five minutes. If a potential customer has clicked on or browsed to a particular product, they may need a little time to look at the product texture, read any notecard given to them, and generally make up their mind. Give them enough time to buy before shuffling away the product in which they are interested.
[SHUFFLE] sets the interval which will elapse between random product reshuffles. This setting is ignored if the "idle" setting is "Never" - see above)
The possible intervals are "30 seconds", "1 minute", "1.5 minutes", "3 minutes", "5 minutes", "10 minutes", "15 minutes", "30 minutes", "1 hour".
We recommend a minimum of three minutes: very rapid changes will barely allow product images to render fully in your customers viewers before they are replaced.
[SOUND] switches the vendor's sound effects on and off.
[TEXT] determines the colour of the "floating text" shown at the centre of the main product panel. Choices are "None" (to switch the floating text off), "White", "Black", "Yellow", "Cyan", "Magenta", "Red", "Green", or "Blue".
[CHAT] controls the range over which product announcements can be heard. The announcements state the name and price of each product as customers browse, or the vendor shuffles between them. Options are "None" (disabling chat announcements), "10m" (whispered announcements), "20m" (normally spoken announcements), or "100m" (shouted announcements).
(Please take care with this setting. Chat spam is generally unpopular and, if audible on other people's land, even against Second Life TOS.)
[IMS] enables or disables IMs from the vendor notifying you of each sale. The IM will report the name and location of the vendor, the name of the product sold, the price paid, and any revenue split paid. (If you are splitting revenue with someone else, they will also receive copies of these IMs.)
Bright Hat Vendor: [Mizar 28,28,2001] Philip Linden bought
'"I Love Shan!" Hat' for L$75. L$8 (10% rounded up) was
sent to Iggy Hyx.
[SPLIT] displays the revenue split box: see below.
[GO ONLINE] switches your vendor on: see below.
Click the [SIZE] button on your settings menu to display the size menu.
Jane Doe's 'Bright Multivendor'

Main panel size: 200cm x 200cm

Please click below to...
make the panel [BIGGER] or [SMALLER], or
...set [WIDTH:HEIGHT] aspect ratio for all panels.
The following buttons are available.
[1:1] [4:3] [3:4]
[2:1] [3:2] [5:4]
[1:2] [2:3] [4:5]
[BIGGER] [SMALLER] [<BACK]
[BIGGER] and [SMALLER] adjust the size of your vendor. The longer side of the main product panel can be set to between 0.5m and 30m, and will change in steps of 0.5m up to 4m, 1m up to 12m, and 2m beyond that.
(If you make your vendor so big that the wings overhang into someone else's parcel, Second Life may refuse to position them correctly! If this happens, just reduce its size until the wings are back on your own land, and the wings will be repositioned correctly.)
The [width:height] buttons set the aspect ratio of the display panels. For instance, [4:3] puts the panels into landscape, 4 units wide by 3 high.
[<BACK] will return you to the main settings menu: see above.
Please note that if you try to resize your vendor using the Second Life editor, it will simply revert to its original form. Always use the size menu: it is very precise, and will automatically reshape and resize wing prims to match the main prim.
Click the [WINGS] button on your settings menu to display the wing menu.
Jane Doe's 'Bright Multivendor'

Number of wings: 2

A wing is a prim displaying 4 small product panels.
Users can click the wings to switch between products.
Add as many as you need using [+1 WING] and [-1 WING].

[+1 WING] [-1 WING] [<BACK]
[+1 WING] and [-1 WING] will add or remove wing prims to your vendor. You may attach between 0 and 8. Each carries 4 small display panels.
[<BACK] will return you to the main settings menu: see above.
If you wish to send a percentage of each payment you receive to another person, begin by clicking the [Split] button in the settings menu described above.
You will need to know your partners 36 character avatar UUID or "key". If you don't, just have them stand nearby when you click [Split], as the keys of everyone around the vendor will be displayed when you do.
The following window will pop up:
Jane Doe's 'Bright Multivendor'

Enter the key of the recipient, an '=', and their percentage
(or 'NONE' for no split). Eg, for 25% to Shan Bright...

4b16ad11-0a56-4627-8eb6-4c88a9850fb5=25
Below these instructions will appear a text entry box and two buttons.
[                                          ]
[Submit] [Ignore]
Just enter the key of the person you wish to split your takings with, followed by an "=" sign, and their percentage. Then click [Submit].
Please bear in mind that to make sure they always receive at least the promised percentage, the number of Lindens sent to them will always be rounded *up*. So for instance, if you promise them 10%, and sell an item for L$5, they will receive L$1.
To *clear* an existing split, just enter "NONE".
Having loaded and configured your vendor, click [GO ONLINE] from the main settings menu.
If you have made any mistakes while loading the vendor - for instance, if you have loaded a product for sale which has no corresponding product texture - the vendor will explain these. Load or rename items as necessary and try again.
But if all is well, you will be asked to grant "debit" permissions, which will allow the vendor to return mispayments (eg. payments for the wrong amount), or pay revenue splits. Grant the permissions, and the vendor will go online.
(NOTE: Mispayments will probably never happen, as the vendor will always instruct the "pay" dialog to offer a single button to pay the correct acount. However, Linden Lab advise that, theoretically, a third party viewer might allow a user to manually override the payment amount, and that vendors should therefore be ready to cope if it is wrong. The Bright Multivendor will therefore return any payment which doesn't match the price of the current product.)
Once online, the vendor will display one product on the main panel, and four products on the four smaller panels on each "wing". If there are more panels than products, the sequence of displayed products will repeat: panels are never left blank.
Your products will be shown in sorted name order. Clicking on any small panel will scroll the products so as to show the one clicked on the main panel.
If the product on the main panel is free, clicking it will give the customer a folder containing the product, the texture illustrating it, and the corresponding notecard (if there is one).
If the product is for sale, clicking the main panel will display the product name and price in chat, and give the customer the product's corresponding notecard (if there is one).
Product: Bright Abeja boxed #008zm
Price: L$595
You have been sent an information notecard.
To buy, just right-click and click 'Pay'.
Right-clicking and paying the vendor will give the customer a folder containing the product, its texture, and (again, if there is one) its notecard.
Clicking the left and right arrow buttons under the main panel will scroll through the products.
If there are enough panels to show all the products at once, an arrow click will scroll the products by one place, moving the next (or previous) product onto the main panel.
If there are at least twice as many products as panels, the arrows will scroll forward or backwards to fill all the panels with new products on each click. So if you have 30 products and 11 panels, each click right will scroll 11 places: showing products 1-11, then 12-22, then 23-30/1-3, and so on.
If there are too many products to show at once, but not enough to show new products on each panel on each click, then clicking the right arrow will scroll forward sufficiently to show those products not currently visible. So if you have 15 products but only 11 panels, each click on the right arrow will scroll four places: showing products 1-11, then 5-15, then 9-15/1-4, etc.
In this way, each product is given equal display time as the customer scrolls through the products.
To take your vendor offline, click it and *hold down the mouse button*. After a second, a pop-up menu will appear:
Long click detected: go offline?
[YES] [NO]
Click [YES], and the vendor will reset and go offline. The panels will all show "Sorry! This vendor is offline".
If you need to, you can safely leave it like this. Customers clicking the vendor will simply hear an apology, explaining that the vendor is offline.
But if you click the vendor, it will return to the settings menu described above.
* DO change the name of your vendor to reflect your company or product names, as it will appear at the beginning of any messages it sends to your customers while they are using it.
* DO offer information notecards! Customers will feel more confident about buying if they can read more detailed information than you can cram into a product image.
* DO set "Next Owner" permissions on your textures and notecards. Remember that a copy of the texture advertising the product, and any accompanying notecard, will be given to the customer along with the product of they buy it. Customers like this as it helps them identify what is in the folder: if they buy three hats, it is handy to have pictures reminding them what the hats look like without having to wear them. If you don't want them to have full perms textures, just set their "Next Owner" permissions to (say) "Copy, No Transfer, No Mod".
* DON'T spam: be careful with product chat. Don't shout into other people's land, and don't annoy potential customers by announcing frequent product shuffles.
* DON'T use alpha textures unless you have to. They are usually used for transparency, but surprisingly even textures with no see-through parts can be alpha. Alphas look odd if put in front of other alphas: and there may be other alphas around the vendor. To test your texture, create a sphere (handy as it only has one face), apply your texture, and with the sphere still selected with the editor press Control+Alt+Shift-T for texture information. This will report it "alpha" or "opaque".
* DO rez multiple vendors. Take advantage of the Bright Multivendor being copyable. Instead of dropping 60 hats into one vendor, consider splitting them between, say, "Formal Hats", "Casual Hats", and "Fun Hats". Help the customer find what they want without having to browse through a lot of things they aren't interested in.
Shan Bright
Chief Executive Officer