The perfect way to organise, store, back up, search, use & distribute inventory!
The Bright Inventory Box is the perfect way to organise, store, back up, search, and use all your stuff.
Most of us accumulate huge inventories: making it difficult to keep things organised, tiresome to find the right folder, and slow to search by name. Worse still, sometimes we lose things - by accidental deletion, or by the dreaded Second Life "inventory loss". When they cost real money, or took work to make, that can hurt.
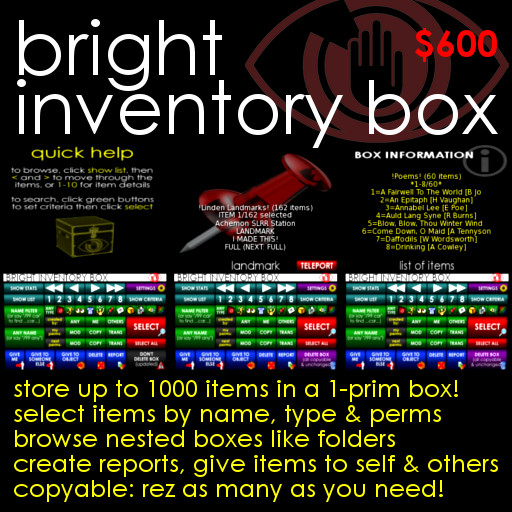
A Bright Inventory Box is a single, one-prim object which can be used to store up to 1000 other objects: reducing that collection of textures to a neat, single line in your inventory, or providing a safe back-up of all your favourite, and most expensive, copyable items in a *single prim*. And being copyable, you can create and fill as many boxes as you need.
But the Bright Inventory Box provides much more than just a backup.
SL doesn't allow folders to be created inside prims. But by collecting items into boxes, and putting those boxes inside other boxes, you can *simulate* folders. The Bright Inventory Box will guide you through nested boxes to find the items you need.
It can display a breakdown of its contents by type. It can allow you to browse through a list of the items, or view item details one by one, showing their names, types, current permissions, next owner permissions, and (if a texture) displaying the texture itself.
You can find an individual item by a quick name search: just say "/99 car" to find "Red Car", "My Placard" and so on. Or you can select a group of items by a combination of criteria: name, type, whether you created them, and their current and next owner permissions.
Having found an item, or group of items, you can take them back into inventory, give them to another avatar, copy them into another object (or inventory box), produce a detailed report of them, or delete them.
You can even use items while they are still in the box: try animations, teleport to landmarks, read notecards into chat, play sounds, and view textures. And you can rez any object instantly.
Optionally, you can also allow group or public access to some or all of these functions: allowing others to browse through an inventory box of (say) information notecards and read them into chat, or take copies of freebies and landmarks.
So bring your inventory under control, protect yourself against loss, and put all those forgotten items back to work, using Bright Inventory Boxes!
Drag the object "Bright Inventory Box boxed" from your inventory onto the ground. Right-click it, select "Open", and click "Copy To Inventory". This will create a folder called "Bright Inventory Box boxed" in your inventory. From here, rez the object "!Bright Inventory Box!".
Right-click, select "Edit", and change the name to reflect what you plan to keep in the box: eg. "!Hats!". Always leave "!" marks around the name to identify it as an inventory box.
To add items, hold down your Control key, drag them from your inventory over the box until it glows red, and drop them. To select multiple items to drag, click one, then hold down your Shift key while clicking another: all the items in-between will be selected. You can drag single folders as long as they don't contain more than 42 items - a limit applied by Second Life itself.
Alternatively, right-click the box and click "Open" to display its "Contents" window, and just drag items into that.
You can store up to 1000 items. Nothing bad will happen if you add more, but the box will only count and search the first 1000. (But we do recommend you keep far fewer items in each box: splitting them into different boxes makes it easier to find what you want.)
Your inventory box will show an "updated" message. When you have finished adding items, just click the box to reset it.
You can add more items in this way at any time.
In floating text, your box will now show its name, the number of items it contains, and a list of the first 8.
Click [SHOW STATS] to show a breakdown of the items in the box by type.
Click [SHOW LIST] to return to the item list, [<] or [>] to move through it, or [<<] and [>>] to move to the ends.
Click [1]-[8] to display the details of an individual item in the list. You can now move through the items one by one by clicking [<] [>] [<<] and [>>].
Many items can be used straight from the box, without taking them back into your inventory. When you display an individual item, a special button may be displayed depending on its type.
Animations: Click [TRIGGER] to try it. Switch off your AO so that it doesn't get overridden. If the animation is looped, it will stop after 5 seconds.
Landmarks: Click [TELEPORT] to read a link to its destination into chat. Press Control+H to open your chat window, and click the link to TP.
Notecards: Click [READ] to read the contents into chat. Only you will hear it: it will not spam avatars nearby. (Note that SL doesn't allow objects to read more than 255 characters of each line, so very long lines may be cut short.)
Objects: Click [REZ] to rez an object in front of the box. (Remember: if it is no-copy, doing this will remove it from the box.)
Sounds: Click [PLAY] to hear them.
Textures: The texture will already be displayed, shaded, behind its details in floating text. Click [VIEW] to hide the floating text and make it bright. A menu will pop-up, allowing you to change the number of repeats, or isolate primary colours: eg. click [SEE 3 x 3] to see a grid of 9, or [RED] to see the R component of the RGB mix.
Second Life doesn't allow you to create folders inside prims.
But you *can* put items inside a Bright Inventory Box, and then put that box inside another box. This is called "nesting".
Nested boxes work a little like folders, keeping a smaller group of items together. You can spot them in your list because they begin and end in "!" marks, and "!" will sort them to the top of your list.
Like animations, objects and so on (see "USING ITEMS" above), when you display the details of an individual inventory box, it will have its own special button: click [OPEN] to rez the nested box.
It will rez immediately in front of the main box, hiding its screen. This is equivalent to opening a folder in your inventory.
You can now use the controls to look through your nested box, exactly as you looked through the main box.
As long as the nested box doesn't contain no-copy items, it will have a [DELETE BOX] button. Click this when you have finished with it to allow access to the main box again. The nested box will disappear automatically if left unused for a few minutes, again, providing it doesn't contain no-copy items.
You can put nested boxes inside nested boxes, to any depth.
To begin with, [SHOW LIST] will show a list of *all* the items in your box.
You can restrict this list by setting "criteria", and then "selecting" the items you are interested in.
To make a quick selection by name, just say (for instance) "/99 car" in chat. This will select all items with car in their name, like "Red Car" and "My Placard", tell you how many there are, and restrict the list to show only these.
Click [SHOW CRITERIA] at any time to show the criteria currently applied to the list.
You can apply more detailed criteria by clicking the green buttons.
For instance, click the [ANIMATION ICON] to match only animations. Unlike the special "quick selection" done above using chat, the selection will not be done immediately. Instead, the existing criteria will be displayed, and against the type, "-> AN" will appear, showing that you have chosen the animation type as a new criterion ready to be applied.
Click the [SOUND ICON] to change this to "-> AN/SO", meaning that the new criterion allows animations and sounds.
Click [(my perms:) MOD] twice, first to set "-> MOD", then to cycle this to "-> NO-MOD", meaning that only animations and sounds which you *can't* modify will match.
Then click [(my perms:)TRANS] to change this to "-> NO-MOD TRANS", meaning that only no-mod, transferable animations and sounds will match.
When you have finished entering your new criteria, click [SELECT].
The box will then search for items matching your criteria: this usually takes only seconds.
You will be told how many items have been selected, and the list will be redisplayed showing only these.
(If *no* items match the criteria, the box will tell you this, and revert to the former criteria.)
To clear your criteria, and select all the items again, click [SELECT ALL].
(Please note when using [(created by:) ME] - objects which you have created, but which contain items such as scripts or animations created by others, are classified by Second Life as having "multiple creators", and so will not be selected.)
You can take items from the box back into your own inventory, give them to other avatars, copy them into other objects, delete them, or create a detailed report about them, by clicking the blue buttons: [GIVE ME], [GIVE TO SOMEONE ELSE], [GIVE TO OBJECT], [DELETE] or [REPORT].
If the box is displaying the details of an individual item, only that item will be acted on.
If the box is displaying a list, all the items in the list (note: not just the 8 displayed) will be acted on.
[GIVE ME] will give you the current item, or a folder containing all of the items in the list. If there are more than 40 items, it will divide them into folders of 40 items each.
[GIVE TO SOMEONE ELSE] will display a list of nearby avatars, and give the items to the one you choose.
[GIVE TO OBJECT] will display a list of nearby objects, and copy the items into the root prim of the object you choose. (Note that this is an easy way to copy items into a new inventory box.)
Second Life applies a few restrictions:
1. If you are giving a list of items, no-copy items will be excluded.
2. If you are giving a single item, it can be no-copy, but it will then be removed from your inventory box.
3. You cannot give no-transfer items to other avatars or objects belonging to other people.
4. You can only copy items into objects belonging to other people if they "allow drops". (If you Control+drag an item from your inventory over someone else's object and it glows red, then it "allows drops".)
[DELETE] will first display a confirmation box, and if you click "YES, DELETE" will then delete items.
[REPORT] will report information in chat about items. This will not spam avatars around you - only you will hear it. The report looks like this:
[08:29] !SL Library Objects!: *** START OF REPORT ***
[08:29] !SL Library Objects!: ITEM 1/1
NAME: Kart 1.0
TYPE: OBJECT
CREATOR: Multiple creators
KEY: 0f598821-7193-8dd5-3f24-5026aeeff075
[08:29] !SL Library Objects!: *** END OF REPORT ***
Deleting copyable boxes:
When you rez a Bright Inventory Box from your inventory, if it doesn't contain any no-copy items, it will have a purple "DELETE BOX" button in the lower right corner. This is because the box knows there is still a copy in your inventory, so it is safe to delete. Just click the button, click "I'M SURE" in the confirmation dialog, and it will disappear.
If you add items, or change its settings (see below), the box will display an "updated" message. When you have finished updating it, click the box and it will reset. Now, instead of the purple button will be a warning *not* to delete the box, as it has been updated, and is no longer the same as the version in your inventory.
To save the changes you've made to the box, delete the old version from your inventory, right-click the box, and "Take" it back. If you want to leave a copy in-world, just drag it back from your inventory onto the ground to rez it again. The purple "DELETE BOX" button will be back, as the box knows it is once again the same as the version in your inventory.
Deleting no-copy boxes:
If your box contains even one no-copy item, when you rez it, Second Life will delete it from your inventory, as it does when you rez any no-copy object. An inventory box which contains no-copy items will *never* have a "DELETE BOX" button. If you want to remove it from in-world, you must right-click it and "Take" it back into your inventory.
Deleting nested boxes:
All of the above also applies to an inventory box which has been "opened" from another inventory box: a "nested box". If the nested box doesn't contain any no-copy items, it will have a purple "DELETE BOX" button, and the button will also say "(nested box: will self-delete)". You can click the button to delete the box, or if it is left unused it will eventually "time out" and delete itself automatically. But if the nested box contains no-copy items, it will have no delete button, and never self-delete.
Click the [SETTINGS] button to display the settings menu.
[START MODE] When you rez your box, and every time it "times out" after use, it will reset and start again in one of these modes: [NO TEXT] no floating text, [BOX NAME] only the box name and item count, [ITEM LIST] showing a list of all items, [ITEM DETAILS] showing the details of the first item, [STATISTICS] showing a breakdown of the box items by type, [CRITERIA] showing the selection criteria.
[SOUND] Switches the sound on and off.
[SIZE] Sets the height of the box to [50cm], [100cm], [150cm], [200cm], [250cm], [300cm], [400cm], [500cm], [600cm], [750cm], or [1000cm].
[TIMEOUT] The box will automatically "time out" and reset after a certain period unused. This option can set the timeout period to [2min], [5min], [10min], [15min], [20min], [30min], [40min], [50min], [60min], [90min], or [120min].
[CHANNEL] If you have more than one box within chat range and say "/99 car" (see SELECTING ITEMS above), they will *all* simultaneously search for the "car" string. You can avoid this problem by clicking the green "NAME FILTER" button instead, or you can use this setting to make a particular box respond to a different channel. The choices are [/1], [/2], [/3], [/4], [/5], [/11], [/22], [/33], [/44], [/66], or [/99].
[COLOURS] Different kinds of information are shown in different colours of floating text. You can use this setting to change the chosen colours for [BOX NAME], [ITEM LIST], [ITEM DETAILS], [STATS] and [CRITERIA] to [WHITE], [YELLOW], [CYAN], [RED], [GREEN], or [BLUE]. For instance, to set the statistics text to blue, click [STATS] then [BLUE].
[SCREEN] When individual item details are displayed, the upper surface of the inventory box (its "screen") shows a cartoon icon representing its type, or (if it is a texture) the texture itself, behind the floating text. To avoid making the text difficult to read, this texture is shaded. You can control how dark this shading is by selecting [0%] (no shading), [5%], [10%], [20%], [30%], [40%], [50%], [60%], [70%], [80%], or [90%] (very dark shading).
[ACCESS] As delivered, only you can use your inventory box. However, you can use these settings to give other people access to some or all of its features. Each of the following can be set to [OWNER], [GROUP] (members of whichever group the box is set to), or [PUBLIC] (anyone):
[BROWSE] See item lists, item details, stats and criteria, make selections, and use individual item actions (such as [PLAY] sound) except [REZ] object. Browsing is generally safe to offer to others.
[GIVE SELF] Safe to offer to others, providing you are happy to give away the items in your box, and they are copyable and transferable.
HOWEVER, WE RECOMMEND THE FOLLOWING FEATURES ARE ALL RESTRICTED TO [OWNER]: [GIVE OTHERS], [REZ ITEMS], [DELETE ITEMS], and [DELETE BOX].
These features should be made available to others only in exceptional circumstances, such as (for instance) allowing trusted managers in a management group to maintain your site.
You'll find a box called "!Bright Inventory DEMO Box!". This is designed to let you play with the boxes before you decide how to organise your own. It contains a wide mixture of items with different permissions: you are welcome to use them as you like.
Rez the "!Bright Inventory DEMO Box!" and it will display a list of 8 nested boxes. Click [1]-[8] to see the item details for any of these, and click [OPEN] to rez and explore them. They are:
!CC Abstract Art! - A collection of 24 "Creative Commons" abstract art textures, with COPY/TRANS rights. They were originally collected for the "Bright Box of Abstracts", which offers them in scripted frames, and is available free from the Bright Megashop.
!Linden Landmarks! - 162 Landmarks, to almost all publicly accessible parcels owned by Governor Linden, the Linden's Department of Public Works, or other Linden Lab groups. It contains some fascinating sites, offering help ("Volunteer HQ"), preserving historical builds ("Governor Linden's Mansion"), distributing freebies ("Free Bazaar"), offering building materials ("Mole Mart"), or simply home to lovingly made builds ("Temple of Iris"). Many of these sites are little known, and well worth a visit.
!PD Textures! - 100 full perm public domain textures, from various sources. They were originally collected and released as "Bright PD100", which offers them in scripted frames, and documents their sources. It is available free from the Bright Megashop.
!Poems! - 60 COPY/TRANS notecards, each containing a classic English-language poem, now out of copyright and taken from various books on Project Gutenberg.
!SL Library Accessories!, !SL Library Hair! and !SL Library Objects! - The entire contents of the "Accessories" and "Objects" folders in the SL Library, all full perms.
!Various! - All of the items in the boxes above - 626 in total - emptied into a single box. This allows you to experiment with a box containing a lot of items, and a wide mixture of types and permissions.
We know you've found your inventory boxes useful, and hope you will find your new inventory boxes even more so.
Here is a summary of the new features:
* Graphic, clickable buttons, and coloured, persistent floating text, replace the old dialog box based interface.
* Selection now possible by type, owner-creation, current permissions, next permissions, as well as by name.
* Improved support for nested boxes, making them easy and intuitive to access, and a partial replacement for inventory folders.
* Increased capacity: boxes can now store up to 1000 items with memory to spare.
* Increased search speed: 1000 items can be searched in seconds.
* Intelligent box status warnings/delete buttons to clarify when boxes can be safely deleted.
* Support for teleporting to landmarks, reading notecards, and displaying textures.
* Reporting on single items or item selections.
* Optional, finely configurable, security controlled, group or public access.
Two features have been dropped. Firstly, it is no longer practical to wear your box as a HUD. Secondly, the box no longer creates special lists for items manually given names looking like folder paths.
While they had their fans, both these things caused confusion to many. Second Life will only allow full-perm items to be dropped into HUDs, hugely limiting their usefulness (and frustrating many who did not know this.) And the item renaming system was, in practice, enormously laborious to implement, as it required complex renaming of every individual item, and required modify rights to them all.
However, the old boxes will keep working, and it has been two years since the last bug was reported, so they are very stable. If you need these facilities, keep them and love them. There is nothing to stop you using them alongside the new boxes, which we hope you will enjoy too!
How to upgrade an old box:
1. Rez the old box and delete the old script.
2. Rez a new "!Bright Inventory Box!" and drag the three scripts inside into your inventory.
3. Drag the three new scripts from your inventory into the old box, which will then be automatically reshaped, retextured, and reset.
* Change the name of your box to tell you what's inside! The floating text will be more useful if you do, and the name will tell you what the box contains if you keep it in your inventory, or "nested" in another box. When you've finished copying your fleet of cars into a box, change the box name to "!My cars!".
* Use "nested" boxes to do the same job as folders in your inventory. If you have hundreds of T-shirts, put them all in your "!My T-shirts!" box and then put *that* into your "!My Clothes!" box.
* If you want to separate a huge pile of items by type, dump them all (unsorted) into one box, and rez other empty boxes nearby and rename them "!Body Parts!", "!Landmarks!" and so on. Then click [BODYPARTS ICON], [SELECT], and [GIVE TO OBJECT], choosing "!Body Parts!" as their destination. Do this for each type.
* Ideally, try not to mix copyable and no-copy items in a box. If you keep everything in the box copyable, you can then copy the whole box too if you need to. A quick way of separating copyable and no-copy items is to rez a new box, rename it "!Copyable!", click the original box [(my perms:) COPY], [SELECT], and [GIVE TO OBJECT], choosing "!Copyable!" as their destination, and finally click [DELETE], leaving only no-copy items in the original box.
* When you are shopping, favour products which are *copyable* - because you will be able to create safe "back ups" of these objects in a box: and never risk losing them, or damaging them by editing.
* If you would like to keep a box rezzed in world as a back-up against inventory loss, but don't have any land, perhaps get together with a few friends, and club together to rent the smallest bit of space you can - you only need one prim each to create a safe backup of up to 1000 copyable items.
* Put inventory boxes with [BROWSE] and [GIVE ME] access set to [PUBLIC] in your shop or venue, and let people help themselves to landmarks, information notecards, freebie T-shirts, or anything they like. Or give the box BROWSE access only, and use it to let visitors [TELEPORT] to different landmarked locations, [TRIGGER] demo versions of animations you sell, [READ] information notecards, [VIEW] textures and so on, without even having to take them out of the box!
* Above all: USE YOUR BOXES! They can only make a difference if you do! You'll find that while filling them up, you'll come across lots of things you'd forgotten you had, some things you thought you'd lost, and other things you can throw away - so you'll be getting more organised even while you decide what to put in them! And the more you use these boxes, the tidier your inventory will become, and the more you will be able to enjoy your hard earned possessions!
Shan Bright
Chief Executive Officer