Create copy/trans books! Your name as creator, animations, click tabs, & more!
The Bright Book Creator allows you to create your own books, and give them away, or sell them, as you wish.
* Your book will show your name as creator.
* You can add up to 256 pages, including animated textures, multi-page textures, & textures spread across double pages.
* You can also add a contents menu, clickable tabs, or clickable "hotspots" on your pages.
* Each contents menu button, tab, or hotspot, can turn to a particular page, send messages, give items, or open web pages.
* Your pages are stored in your book, not in an off-world database which might go offline at any time.
* Each book has control ribbons: click to open the contents menu, settings, a bookmarks menu, or go to any page number.
* Books may be distributed with copy perms, trans, or both (but not modify - your readers can use settings to adjust the book).
* Your published book will not contain texture items or UUIDs.
* Pages can be from 50cm to 12 metres high, with any aspect ratio between 2:1 and 1:2. (So 2:1 pages may be up to 24m across, and a book might reach 48m across when open!)
* Optionally, pages can show page numbers in the corners.
* You book can be rezzed in-world, or worn as a HUD.
Click the right page to turn ahead, the left to turn back, or either cover to close the book.
Click the blue ribbon for contents, the red for settings (including height, aspect ratio, brightness, and page numbering), the green to set and use bookmarks, and the magenta to jump to a particular page number.
To wear the book as a HUD, find it in your inventory, and double-click to wear it. Two more ribbons will then appear: click the orange ribbon to detach the book, and the cyan to minimise it to an icon, which you can click to reopen the book.
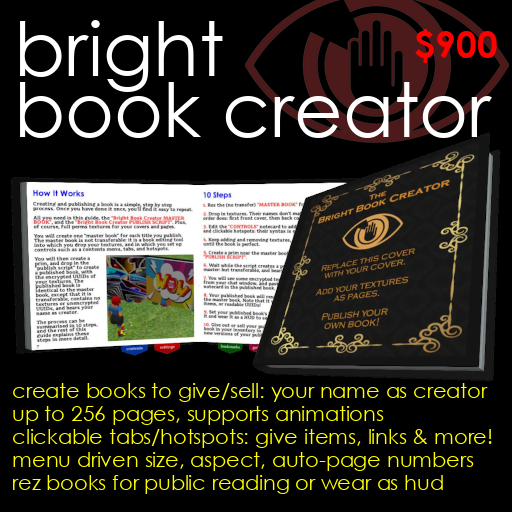
Creating and publishing a book is a simple, step by step process. Once you have done it once, you'll find it easy to repeat.
All you need is this guide, the "Bright Book Creator MASTER BOOK", and the "Bright Book Creator PUBLISH SCRIPT". Plus, of course, full perms textures for your covers and pages.
You will create one "master book" for each title you publish. The master book is not transferable: it is a book editing tool into which you drop your textures, and in which you set up controls such as a contents menu, tabs, and hotspots.
You will then create a prim, and drop in the "publish script" to create a published book, with the encrypted UUIDs of your textures. The published book is identical to the master book, except that it is transferable, contains no textures or unencrypted UUIDs, and bears your name as creator.
The process can be summarised in 10 steps, and the rest of this guide explains these steps in more detail.
1. Rez the (no transfer) "MASTER BOOK" from your inventory.
2. Drop in textures. In sorted name order, the 1st will form the front cover, 2nd the back, 3rd the spine, and the rest the pages.
3. Edit the "CONTROLS" notecard to add a contents menu, tabs, and clickable hotspots: their syntax is explained in this guide.
4. Keep adding and removing textures, and editing controls, until the book is perfect.
5. Create a prim near the master book, and drop in the "PUBLISH SCRIPT".
6. Wait while the script creates a published book based on your master: but transferable, and bearing your name as creator.
7. You will see some encrypted texture keys in chat. Copy these from your chat window, and paste them into the "PAGES" notecard in the published book.
8. Your published book will reset, displaying all the pages from the master book. Note that it will not contain any texture items, or readable UUIDs!
9. Set your published book's "next owner" permissions, and take it and wear it as a HUD to set its default attach point.
10. Give out or sell your published book! And keep your master book in your inventory in case you want to modify it and create new versions of your published book in the future.
Collect the textures you want to use as covers and pages in a folder in your inventory. Their names don't matter, but their sorted order does.
The first will be the front cover, the second the back cover, the third the book spine, and the rest will be the pages inside the book, in the same sorted order they appear in your inventory.
A useful trick is tip is to call your first three cover textures "!1 front", "!2 back", "!3 spine", and the page textures "01...", "02..." and so on. Exclamation marks sort before numbers.
(We include default cover and spine textures with the system: if you don't have your own, you are welcome use these!)
Then find the "Bright Book Creator MASTER BOOK" in your inventory, and drag it onto the ground to rez it.
It will change it's name to "My Book [MASTER]". The master book always adds "[MASTER]" to its own name so that it is not confused with the published books you'll create later.
Right-click the book, and click "OPEN" to show its contents window. Drag in all the textures from your folder. To select them all, click the first, then hold down shift and click the last.
The master book will reset, and you will soon see your textures on the covers and pages of the book.
Now click to turn the pages, add or remove textures, or rename them to change their order, until you are happy with your book.
You can save texture upload costs by storing multiple pages on a single texture. Each texture can hold a grid of pages, up to 16 pages across and 16 pages down. Before you drop the texture into the master book, name it as in this example:
Summer Hats {3x2:1,2}
The text between the {braces} tells the book that the texture stores six pages, in three columns on two rows: and that it should display the page in the first column of the second row. You can then display another hat from the same texture by dropping in another copy of the texture, but with this name:
Summer Hats {3x2:1,3}
You can therefore lay out any single texture across a double-page spread by adding two copies, named as follows:
My Wide Page {2x1:1,1}
My Wide Page {2x1:2,1}
You can also create animated pages. These have "frames" of animation, also layed out on a grid. The following example is a texture divided into 16 frames: 4 columns on 4 rows.
A Moving Image {4x4:14/30}
The "14/30" indicates that the first 14 of these 16 frames should be played in an animated loop at 30 frames per second. The rate may be up to 100fps. A negative rate, like -30, makes the animation "ping pong" (play forwards, then backwards). You can even animate the covers or spine of your book.
Clicking the "contents" ribbon opens the contents menu.
To begin with, your book will have a simple menu: next page, previous page, first page, last page, front cover, back cover.
If you wish, you can add your own contents menu, with buttons to turn to particular pages of your book, or do special things like send messages, give items, or open web pages.
Right-click the book, and select "Open" from the pop-up menu. This will display the "Contents" of the book object. Double-click the "CONTROLS" notecard to open it, and add this line:
button: Chapter 1, My Story Begins... @1
Then click the "Save" button at the bottom of the notecard window. Your book will reset.
Clicking the blue "contents" ribbon will now display a menu with only one item: "[Chapter 1] My Story Begins...".
Each "button:" line in the "CONTROLS" notecard will add a button to your contents menu. They can be up to 254 characters long, and take the form:
button: <label>, <description> <@action>
So in the example above, the button <label> was "Chapter 1", the <description> was "My Story Begins...", and the <@action> was "@1". Labels may be up to 10 characters long, and descriptions up to 25.
@1 means "go to page one". Negative numbers count back from the last page: @-1 means "go to the last page", and so on.
Here are other actions you can add to your contents menu:
@next, @previous, @first, @last, @front, @back - Turn to the next, previous, first, or last page, or front, or back cover.
@message <text> - Say <text> in an instant message to the reader. For instance: @message Hello reader!
@give <item> - Give <item> from the book's inventory. You must add the item to the book's contents first. Texture items are not usually copied to published books, so embed "[GP]" (givable page) or "[GN]" (givable non-page) in the name of any texture you wish to give out to indicate it should be copied. If you use [GN], the texture will not form a page in the book. So to give out your first page texture "01 Intro", change its name to "01 Intro [GP]", and use: @give 01 Intro [GP]
@web <url> - Pops up a dialog offering to open the page <url>, which must begin "http:" or "https:". For instance, to open the Bright Corporation website, use: @web http://brightcorporation.net
You can add multiple actions to a line. For instance:
button: Megashop, Get our landmark! @give Bright
Megashop Landmark @message Please enjoy your visit!
This line will add a button labelled "Megashop" to the contents menu, with a description of "Get our landmark!". When clicked, it will give the reader the item "Bright Megashop Landmark", and tell them "Please enjoy your visit!".
Add a tab by adding this line to the "CONTROLS" notecard:
tab: <pagenum> <colour> <icon> <@action>
<pagenum> is the number of the page on which the tab should appear. If it is 0, the tab will appear on every left hand page.
<colour> is the colour of the tab, one of: white red green blue cyan magenta yellow orange pink
<icon> is the icon which should appear on the tab: blank one two three four five six seven eight nine ten book circle clock cross envelope gift hand help info landmark list map mouse object pen phone smile speech square triangle web
<@action> is the action that should be performed when a reader clicks the tab. Tabs can turn to a page, send messages, give items, or open web pages, using the same action words explained under 'Adding a Contents Menu" above.
Here is an example tab line:
tab: 2 red info @message More info online!
@web http://brightcorporation.net
This causes a red tab showing an "info" icon to appear on page 2. When a user clicks it, they'll hear the message "More info online!", and be invited to open "http://brightcorporation.net".
A "hotspot" is a clickable rectangle on a page. To create a hotspot, add a line to the "CONTROLS" notecard of the form:
hotspot: <pagenum> <top> <bottom> <left> <right> <@action>
<pagenum> determines which page has the hotspot. If it is 0, the hotpot will be in the same place on every page.
<top> <bottom> <left> <right> are all percentages, indicating where the boundaries of the hotspot are on the page. This is best understood by examining the example below.
<@action> determines what should happen when a reader clicks the hotspot. Hotspots can turn to a page, send messages, give items, or open web pages, using the same action words as explained under "Adding a Contents Menu" above. For example:
hotspot: 2 0 50 50 100 @message Hello!
The top of this hotspot is 0% down the page, and the bottom is 50% down: so it is limited to the top half of the page.
The left of this hotspot is 50% across the page (left to right), and the right is 100% across: so it is limited to the right of the page.
So if anyone clicks the top right quarter of page 2, they will hear the message "Hello!".
Make sure your master book is just as you want it. Check the the covers, pages, and controls. Check the settings. Edit it to give it a meaningful name and description.
Right-click the ground near the master book, select "Create" from the pop-up menu, and click the ground to create a cube.
Drag the "Bright Book Creator PUBLISH SCRIPT" from your inventory and drop it on the cube. A dialog box will appear: grant linking permission. The script will then turn your cube into a blank, transferable book, with your name as creator.
You will see lines of encrypted texture keys in chat.
[12:13] LINE 01/08: b0981a8dd8872cb6d26b3f6b115e
1cae815f276e7268d183ac6cd452...
Press Control+H to open your chat window, drag your cursor over these lines to select them, and press Control+C to copy.
Right-click your new, blank book, and choose "Open" from the pop-up menu to show its contents window. Double click the "PAGES" notecard, click inside the notecard editor, and press "Control+V" to paste the lines you copied. Click "Save", and your book will reset, showing the covers and pages from the master book: but without containing any of the textures themselves.
NOTE: The lines in PAGES are specifically encrypted for this book. If you try and paste them into another book, or someone else tries to copy them into one of their books, they will not work. Your pages are protected from being copied.
Finally, set your book's default attach point and permissions.
Attach Point: Your published book is a new object which has never been "worn", and so has no default attach point. If someone wore it, Second Life would attach it to their hand.
Take it into your inventory, right-click it, select "Attach To HUD", and "Centre". In a few seconds, the book will have resized itself for your screen. Whenever this book is worn in future, it will attach itself to the centre of the wearer's HUD.
Permissions: Rez your book - do not set permissions while it is in your inventory! Then right-click it, select "Edit" from the pop up menu, and under the "General" tab find the "Next Owner" tick boxes.
DO NOT TICK "MODIFY". Your readers never need to edit your book. Settings can adjust its size, and any other manual changes to the prims may be overridden by the book's scripts.
If they edit PAGES, they will inevitably break the book. If they edit CONTROLS, they may add things you don't want in a book under your name. To protect your work, if someone receives a book with modify permissions, it will delete itself when rezzed.
You can grant "Copy", "Transfer", or even both. Just be aware that if you do grant both, anyone receiving this book will be able to give away (or even sell) as many as they wish.
* If you are a creator with a range of products, create a catalogue. Include your product labels as pages, and add tabs or hotspots to give out demos, links to your website or Second Life Marketplace listings, and teleport links to your store!
* Publish a guide book for your park, gallery, museum, or other public venue. Put a map on the first page, with a clickable hotspot over each major attraction which turns to a page which describing it. And make sure each attraction page has a tab or hotspot which sends a message with a teleport link!
* If you are creating a book as a form of advertising - for your venue, products, or company - make it pretty, make it fun, and make it COPY/TRANS, so that people are able to pass it on to each other. The best marketing is the marketing your customers do for you.
* If you are creating books for sale, consider making a free "sampler" version of the book for people to try. For instance, if it is a book of 100 photographs you have taken around the world, create a free book with just 10 representative photographs, and add a page advertising the full version and where it can be bought. People love freebies, and even if many don't go on to buy the full collection, you'll still reach at least some who will, but who might not have seen your work otherwise.
* Consider publishing your product user manuals as books, rather than notecards. You can use colour, include pictures, and use them both to help your customers, and to market the product to people who don't yet have it - as this book does!
* Display the automatic page numbering, rather than including page numbers in your textures. Otherwise, if you want to add or remove a page in a later version of your book, you'll have to renumber and reupload all the textures for subsequent pages!
* Remember that all Second Life objects have finite storage capacity. We have created working books with 256 pages and 100 lines in the "CONTROLS" notecard, but it depends on how long these lines are: add many more (or very long) controls, and you'll eventually run out of memory. If this happens, consider splitting your book into separate volumes.
* Leave books rezzed for public reading. Anyone can read a book or click its controls: though only their owners can set bookmarks or change settings.
* Use @message to put clickable links in chat. Such links can teleport, open user profiles, and do much more. The complete list of URI's which Second Life understands can be read at:
http://wiki.secondlife.com/wiki/Viewer_URI_Name_Space
Thank you for reading this guide.
If you are considering purchasing the Bright Book Creator, but have any questions about it not covered here, please IM me.
Or if you are using the Bright Book Creator to publish a book, please consider sending me a copy: we would love to see how people are using this product. And if it is intended for free distribution, and you allow us Copy and Transfer permissions, we may add it to a library of books made available through the Bright Megashop where the Bright Book Creator is sold.
May all your books be best-sellers!
Shan Bright
Chief Executive Officer